Color Void Production Process
- Standalone Project
- 21 January
- 14 min read
- 17 min watch time

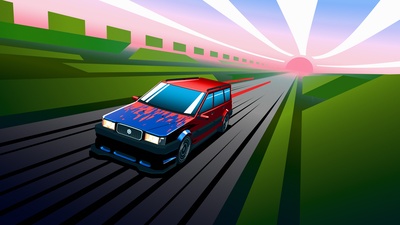
Color Void is a short film and showcase for the release of Grease Pencil 3. This article details various production aspects and offers insights into the decisions involved.
Initial pitch
The Color Void project started after a presentation from Rik Schutte on possible Grease Pencil 3 projects and demo files. Anyone in the team was welcome to start a project after creating an initial pitch of a short lasting 10 seconds. After creating a moodboard and thinking about possible themes, the most straight forward metaphor is the transformation from GP2 to GP3. The theme of transformation offered a lot of possibilities, which I took literally in the form of a new layer of paint.
The pitch focused on a desert setting with a driving/drifting car entering a tunnel resembling a black hole. Once inside, the base paint of the car is stripped away and Grease Pencil strokes create these vibrant and playful lines on the body. In the original pitch, the car would drive off into the sunset after coming out of the tunnel with a possible new visual style.

By using cameras on the body of the car - like people do during track days or in movies - we would get this gritty, fast-paced edit of the entire sequence. But this was later combined with a “camera vehicle”, tracking the movement of the car to cut between moving and static cameras. Instead of using motion blur, I wanted to add “speed ribbons” that match the background color to indicate speed. This turned out to be a lot more complicated to actually place in all of the shots, that is why it is in the third shot only.

Moodboard
Racing posters from the Monaco Grand Prix and other media inspired the visual identity. The style can be described with a limited color scheme, specific gradients and simplification of the world. The sense of speed is communicated via long streaks of color or speed ribbons. Sometimes, the motion blur around the edges of the image is drawn with just single colored rectangles, and at the center a more defined world. The tunnel or ‘Color Void’ sequence is inspired by 2001: A Space Odyssey where streaks of color and light pass by the viewer.
I love and admire automotive design and mechanical engineering which is why I chose a car on a racetrack. A while ago I went to Germany with some friends and drove with our cars on the Nürburgring. It was thrilling and it gave me a sense of freedom that I could put into this short animation project. That is also why the racetrack is inspired by the Nürburgring, probably the most famous track for professional and amateur racing.
After a round of feedback before starting the project, some things changed:
- The setting was changed from a desert to a racetrack
- Due to time constraints we skipped the ending of the car exiting the Color Void
- The transformation sequence should be the most exciting and may take up more time
- We settled on the idea that the final result doesn't have to communicate a 2D style, which is heavily influenced by the layout and the use of 2D backgrounds and limited camera movement
Car creation
Before starting the project I was experimenting with a simple Geometry Nodes setup that allows the user to create simple shapes to block vehicle designs without overthinking topology.
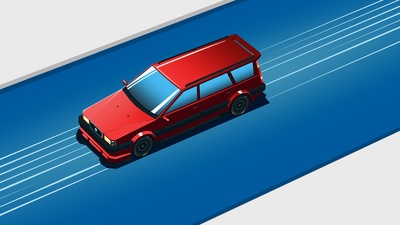
The design of the car and main inspiration is the brick shaped Volvo 850/V70. The characteristic rectangular shape and straight lines work well in this abstract setting. I tried to balance and not overdo with the amount of functional details like adding the correct amount of blinker lights on the fender, windshield wipers, fuel door, registration plates and more. These details would probably muddy or create unnecessary clutter. More on the visual development of the car in Car shading.
Track creation
Creating the track was a long process, over the course of the production, with many smaller adjustments and refinements. I started by using satellite imagery of the Nürburgring where I could measure the width of the track at various segments to get a good sense of scale. Aside from using satellite imagery, the addition of dashcam footage gave a better impression of the tilt and slope of the road. The goal is not to recreate all the functional and mandatory details a racetrack would need, but only the essential elements to communicate enough information in a fast-paced edit. Due to the camera direction and editing flow the track is adapted to suit this aspect better.
I started with a curve from a top-down-view extruding it in the right direction. The height and tilt of the track required some iterations to get right. By simply putting the car model on the curve with a camera, it informed me about the right amount of tilt and slope for the car. After adding the track, the guardrails, grass, terrain, trees, mountains, and clouds followed. Around this time I experimented with various FX and shading techniques.

Some assets in the final version are procedural like the trees and bushes using Geometry Nodes to safe some time on modeling each tree and bush.
Car rigging
Demeter developed a rig for the car focused on more realistic body movements and ground detection. The emphasis back then was creating more realistic and not necessarily stylized animation. During the layout/animation phase I let go of the notion that the car needed all of these mechanics to make it feel "good". So instead we focused more on animation and checking ground contact manually, especially with this style that offers more flexibility.
Hjalti’s input and experiments
In my experience, the layout stage is the foundation of your production: if the layout isn't well thought out, it might undermine all the hard work later during animation, lighting, FX and such. I'm very happy Hjalti took some time to help figure out the pacing and ideas. We were talking about various movies that used static cameras on the body and what possible techniques the creators used. This is when he mentioned I should try using a camera car like a lot of car commercials or action movies use. It might give the final result a more dynamic character which I think was a good decision.
The idea that the camera snapped to the front wheel was interesting. Although the car animation felt too stylized for what I had in mind, it was a good foundation to build on.
Layout
After working on the layout for a week, it started moving in the right direction. During the last stages of the production some shots were trimmed to increase the snappy feeling but also not linger unnecessarily.
Pablico came up with various ideas on how to bring more life and fluidity into the animation. For example, the small drifting movements in the first and third shot and pacing adjustments in the last shot.
Set dressing
Set dressing was based on the camera view without any dynamic assets (changes) per shot. This process was still on-going during the final stages of the production. Set dressing included:
- trees generated with Geometry Nodes
- bushes that also use Geometry Nodes
- decimated rock assets with chipped faceting
- clouds
Shading
The general shading approach, I believe, is a very simple method when working with Eevee by using emission shaders and mixing by using a 'Shader to RGB' node. The simplicity of this way of working is having direct control of the final result in the viewport, without post-processing techniques to rely on the bigger part of the visual style.
This approach is applied to most of the objects in the scene, except for those who are are flat shaded. (single color)
Car shading
The main protagonist, the car, received frequent iterations on modeling and shading. Each shot gives another view of the car creating a chance of visual inconsistencies. To solve this, a bunch of custom properties and drivers were added in the rig to control shading attributes. This also meant having to adjust the look of the car in the animation file. Since I was using the standard production workflow, it would often be a back-and-fourth process of locking the lighting and linking any lights into the animation file.
The approach in creating reflections is a combination of using rectangular shapes for the body paint, and a repeated version for the windows. Together with specific reflection shapes based on the camera view fresnel value to obscure/show the shapes. For the final two shots, a 'Shader to RGB' node is used to create reflections. With the help of a reflection probe inside of the car rig capturing the environment in real-time.
Effects
The effects (excluding compositing) include:
- speed lines on the road
- speed ribbons to get a feeling of motion blur
- the creation of the void (black hole)
- colored strokes outside/inside the tunnel
- particles when a stroke hits the car
- floor speed effect when the car drives through the void
- Grease Pencil strokes on the car
The goal was to use as much Grease Pencil objects as possible. But during production it was a lot easier to use Geometry Nodes to increase flexibility and consistency. Let's start with the creation of the void itself in the fourth shot. Below are three concept images depicting how the void could be created. Solidifying a concept is a good way to remove (mental) obstacles and receive feedback, but it is also useful as reference when trying to create the effect.


The speed lines on the road are essentially a copy of the track curve object where lines are created. Noise is used to offset the lines and vary them in length. The lines are drawn near the car by using the 'Proximity' node with a control value to increase its range.
I used two of these speed line objects on top of each other to 'cut out' the other. Assigning the tarmac material to the top speed lines creates a seamless effect of removing the yellow speed lines. If this can't work, a holdout and compositing would solve this issue.
The hit and Grease Pencil effects on the car are created in the car file. By drawing the design on the car and animating these with the help of the 'Build modifier', it creates the colored strokes. This setup uses a 'Tint' modifier on the strokes set to gradient and a 'Thickness' modifier to have more parametric control of the final look. When creating the design I tried to avoid any glass or plastic parts of the car and make sure the distribution makes sense. The hits are created using a curve and another Geometry Nodes setup to have control of the evolution of the color and thickness. This took more manual labor compared to all of the procedural setups but it was worth it in the end.
Compositing
For the first three shots, the compositing is limited to two node groups, one for animated noise and the second for gamma and exposure controls. The useful thing about these linked node groups is their set values to create consistency between shots.

For the fourth and fifth shot the compositing was more involved to bring all of the effects together. The expanse effect in the fourth shot needed to be on top of the world without being affected by other geometry in the scene.
The last shot required more masking to create the desired look. This is mainly for the reflection setup on the car where Eevee needs the colored strokes, in this case, to be visible in the scene. Where as Cycles is able render reflections with the object hidden from view. Cryptomattes are the solution in this case by selecting all the elements and using a mask into a 'Set to Alpha' node.
Sound design
The music and sound effects are created and edited in Ableton Live. The goal was to create Jungle (sub-genre) music bits to create the feeling of a rush. Alongside the music I wanted to incorporate abstract effects and foley to emphasize the expanse (entrance of the void tunnel) and more. The music is adapted based on the layout where the bass and drums have slight variations.
Looking back
Working on the Color Void project gave me autonomy and freedom to create without too many technical hiccups. Some aspects that went well:
- Using the existing pipeline and methods of working, even though I took some shortcuts to save time
- Utilizing Cloudrig and parameters to increase flexibility
- Developing the effects went well even though some setups might be difficult for general purposes
- Not lingering too long trying to fix everything myself but asking for help
Some aspects that could be improved upon:
- Taking more time for optimization and asset refinement, especially the car
- Visually, the sense of speed could be emphasized more with a better speed ribbon setup
- Visual consistency with more art directed shadows, per asset, per shot, or another method
Thanks to the Blender Studio Team but in particular Pablico Fournier for additional animation, Hjalti Hjálmarsson for inspiration and layout assistance, Falk David for Grease Pencil assistance, Francesco Siddi managing and feedback, and Simon Thommes for Geometry Nodes assistance. Also thanks to Matteo Grazia for allowing the use of recorded car sounds.
Download the vehicle blocker and shot 0040 below:


6 comments

i just notice a error

@Chung Yin Leung What seems to be the issue? The vehicle_blocker.blend is fixed if that's what you mean :).

Upon opening vehicle_blocker.blend, it complained that file vehicle_base_creator.blend is missing, could you also upload that file? thanks.

@Willy Xia Hi, thanks for letting me know, the issue should be fixed

Love this stuff! any chance of the files being uploaded for this one?? I'm interested in the geo-node curves! Thanks!

@krylo1 Hi, certainly, I packed shot 0040. It contains most of the fx seen in the short film. Check the README.txt for more information.
Join to leave a comment.