On this page
Building Shots
Creating your first Asset
The next step is to create an asset and store that information into the Kitsu Server.
- Launch Blender via Project Blender Guide
- Under
Edit>Preferences>Add-OnsensureAsset Pipelineis enabled - Follow the asset pipeline guide to create a new asset collection, ensure these assets are marked as an Asset in Blender.
- Save the above asset within the directory
your_project_name/svn/pro/assets/char(or similar depending on type)
Kitsu Casting
Casting is the process of associating a Kitsu Asset Entity with a given shot, this is how the Shot Builder knows what Assets to link into a given shot.
- Please follow the Kitsu Breakdown guide to Cast your assets to shots.
Load Asset Data into Kitsu
To match Assets File to the casting breakdown on the Kitsu server, we need to tag the Asset with a filepath and collection. This can be done via the Blender Kitsu Add-On. This data will be used to match a Kitsu Asset with a Collection within a .blend file, that will be linked into all shots that have that Asset "casted in it".
- Open the file for a given Asset.
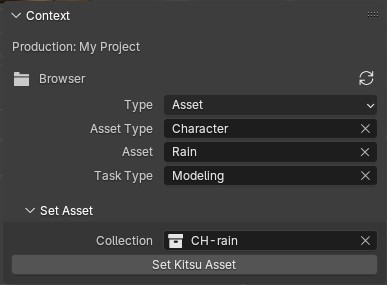
- Under the Kitsu>Context Panel, check the following settings.
- Type is set to Asset.
- Asset Type is set to the correct Asset Type (Collection, Prop, etc)
- Asset Field is set to the matching entry on the Kitsu server for the current file.
- Under the Kitsu>Context>Set Asset sub-panel...
- Collecton is set to the Asset's parent collection.
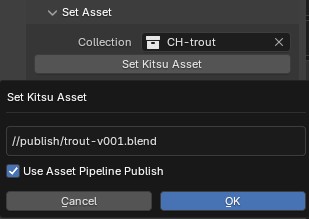
- Run the Set Kitsu Asset operator to send the current filepath and selected collection to the Kitsu Server.
If you are using the Asset Pipeline, the latest publish file will be prompted to confirm using the latest Publish as the Asset target.
You should now see the filepath and collection under the Asset's Metadata on the Kitsu.

Building your First Shot
Before building your first shot, you will need to customize your production's Shot Builder hooks. Inside your production’s assets/scripts/shot-builder directory the Shot Builder hook file should be stored, based on the example included in the Add-On. This file can be automatically created at the correct directory using an operator in the Blender Kitsu Add-On preferences. Hooks are used to extend the functionality of the shot builder, and can be customized on a per project basis.
- Open
Edit>Preferences>Add-Ons - Search for the Blender Kitsu Add-On
- In the Blender Kitsu Add-On preferences find the Shot Builder section
- Run the Operator
Save Shot Builder Hook File - Edit the file
your_project/svn/pro/assets/scripts/shot-builder/hooks.pyto customize your hooks. - Open a new Blender File, select
File>New>Shot File - Select the desired Sequence/Shot from Kitsu and select OK to start Building
- New file will be saved to
your_project_name/svn/pro/shots/{sequence}/{shot}/{shot}.blend