On this page
Shot Assembly
Before Shot Assembly can begin two requirements need to be met. Firstly, shots to be assembled need to have corresponding Tasks on the Kitsu Server, and secondly those shots must have Assets ‘cast’ or associated with each shot. These will describe when the shot happens in the edit and what assets appear in the shot.
Building a Project
Learn how to build a complete project including shots in a step-by-step format, see the Project Usage Guide.
Preparing Metadata Strips from a Previz Sequence
To begin Shot Assembly it is required to describe the name/length of each shot inside a “Video Sequence Editor” .blend file. Once a Previz Sequence has been assembled into the VSE, 'Metadata Strips’ can be created for each shot. A Metadata Strip is an empty video strip that is linked into the project management software Kitsu. Metadata Strips are used to push updates to the frame ranges of each shot to Kitsu, which are later used in the Shot Assembly process.
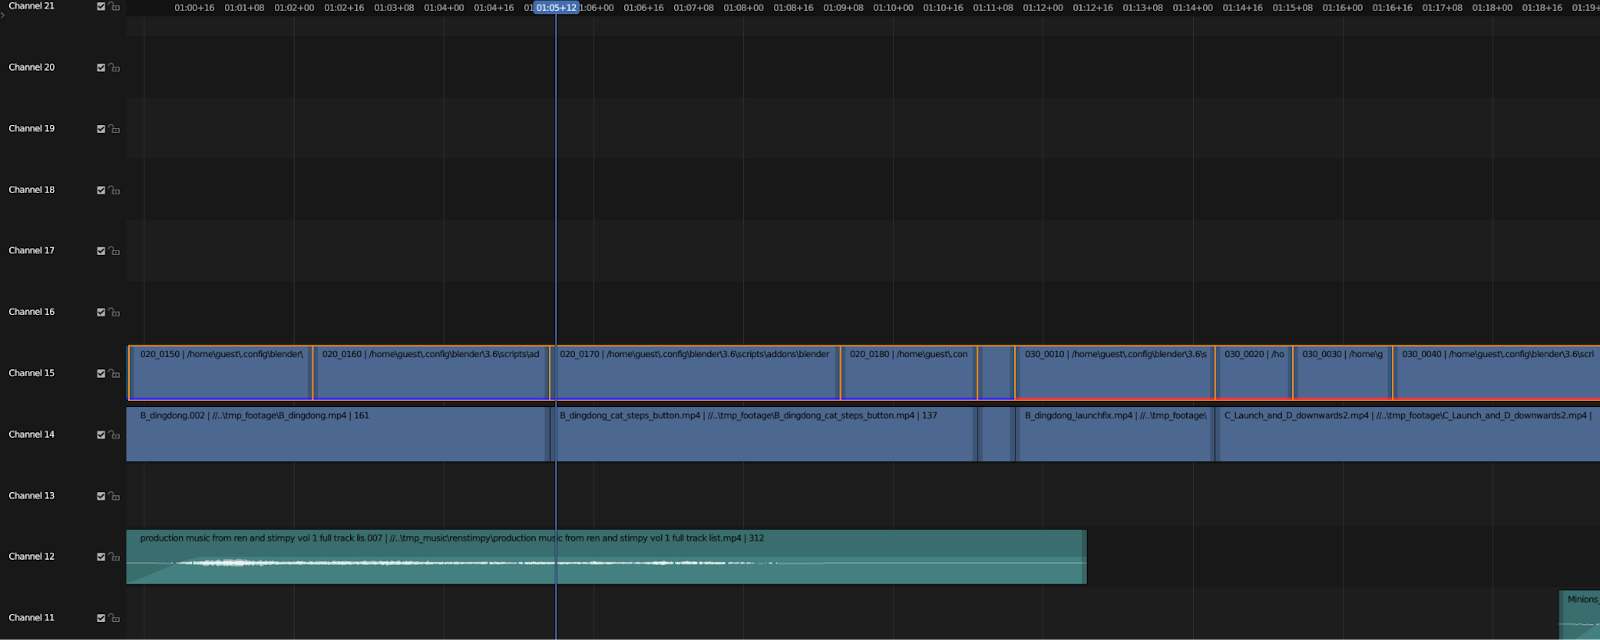
Metadata Strips are created from the Previz Strips, they are either linked to an existing Kitsu Shot, or a new Shot/Sequence can be pushed from the VSE to the Kitsu Server. The shot’s in, out and duration will be determined by the strip’s length. Multiple Metadata Strips can be made out of a single previz strip if required, adjust the shot’s timing by simply trimming the Metadata Strip in the timeline. These Metadata Strips are then pushed to Kitsu Server to update the shot info on the server side. Below is a Previz Sequence with it’s Metadata Strips.
Preparing an Edit
For more information about Metadata Strips and the processes involved in managing the edit of your film see the Prepare Edit Guide.
Creating your first Asset
The next step is to create an asset and store that information into the Kitsu Server.
- Launch Blender via Project Blender Guide
- Under
Edit>Preferences>Add-OnsensureAsset Pipelineis enabled - Follow the asset pipeline guide to create a new asset collection, ensure these assets are marked as an Asset in Blender.
- Save the above asset within the directory
your_project_name/svn/pro/assets/char(or similar depending on type)
Kitsu Casting
Casting is the process of associating a Kitsu Asset Entity with a given shot, this is how the Shot Builder knows what Assets to link into a given shot.
- Please follow the Kitsu Breakdown guide to Cast your assets to shots.
Load Asset Data into Kitsu
To match Assets File to the casting breakdown on the Kitsu server, we need to tag the Asset with a filepath and collection. This can be done via the Blender Kitsu Add-On. This data will be used to match a Kitsu Asset with a Collection within a .blend file, that will be linked into all shots that have that Asset "casted in it".
- Open the file for a given Asset.
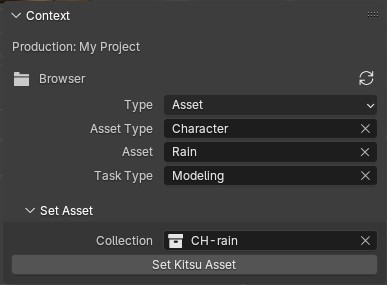
- Under the Kitsu>Context Panel, check the following settings.
- Type is set to Asset.
- Asset Type is set to the correct Asset Type (Collection, Prop, etc)
- Asset Field is set to the matching entry on the Kitsu server for the current file.
- Under the Kitsu>Context>Set Asset sub-panel...
- Collecton is set to the Asset's parent collection.
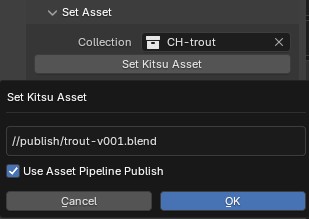
- Run the Set Kitsu Asset operator to send the current filepath and selected collection to the Kitsu Server.
If you are using the Asset Pipeline, the latest publish file will be prompted to confirm using the latest Publish as the Asset target.
You should now see the filepath and collection under the Asset's Metadata on the Kitsu.

Building your First Shot
Before building your first shot, you will need to customize your production's Shot Builder hooks. Inside your production’s assets/scripts/shot-builder directory the Shot Builder hook file should be stored, based on the example included in the Add-On. This file can be automatically created at the correct directory using an operator in the Blender Kitsu Add-On preferences. Hooks are used to extend the functionality of the shot builder, and can be customized on a per project basis.
- Open
Edit>Preferences>Add-Ons - Search for the Blender Kitsu Add-On
- In the Blender Kitsu Add-On preferences find the Shot Builder section
- Run the Operator
Save Shot Builder Hook File - Edit the file
your_project/svn/pro/assets/scripts/shot-builder/hooks.pyto customize your hooks. - Open a new Blender File, select
File>New>Shot File - Select the desired Sequence/Shot from Kitsu and select OK to start Building
- New file will be saved to
your_project_name/svn/pro/shots/{sequence}/{shot}/{shot}.blend
Shot Types
- Animation contains all Assets with Rigs and a linked set, Animators work here, all data that needs to move down the pipeline is placed in a shot_name.anim collection.
- FX contains any effects objects in a collection shot_name.fx. This file will have the shot_name.anim collection linked into it and the shot_name.lighting collection if available.
- Lighting contains all lighting objects, like lights, shadow catchers and any other data related to lighting the scene in an shot_name.lighting collection. This .blend file will also contain a linked version of the shot_name.anim collection and the shot_name.fx collection when available.
- Compositing contains linked copies of the shot_name.anim, shot_name.fx, shot_name.lighting collections. Compositing file contains a Compositing Node Group used for final render. The compositing file is usually used for rendering.
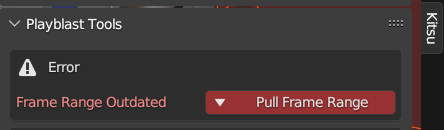
Maintaining Existing Shots
After shots have been created in some cases the shot’s length or position may be adjusted by the editor. These changes will be tracked in Kitsu using the Metadata Strips described above. If a Metadata Strip for a given shot has been changed, those changes will be pushed into Kitsu. In this case when users open a shot file they will be warned within the Playblast Tools section of their Kitsu add-on to pull the new frame range into their .blend file.