Realistic Character Workflow
5: Baking & Exporting

In this chapter we will finally go into baking ideal displacement maps and exporting corrective shape keys for rigging and shading. We'll also go into how to mix and correct the shape maps that are created.
Workflow
Baking requires a bit of preparation to get the desired results.
Essentially we want to get our sculpted shapes separated into three levels of detail. All these three combined should look exactly like the high resolution sculpt:
- Corrective shape keys (Subdivision 0)
- Displacement maps (Subdivision 3)
- Bump maps (Subdivision 5/6)

Exporting Shape Keys
For this step we want the proportions of our high res sculpt on our low poly base. Since our sculpted shape is defined on the Multires subdivisions we still have a base mesh that is completely unchanged.
One solution is to use "Apply Base" on the modifier. But this will lead to an inflated result to counter subdivision shrinking. The ideal base is actually one that will have the exact same proportions as the high res sculpt.
There's a straight forward way to achieve this. We need to duplicate the sculpt and apply the Multires modifier (Ideally on level 1 to save time). Using "Unsubdivide" or "Rebuild Subdivisions" will lead to a base topology that has the exact same vertex positions as the high res sculpt, on any vertex they have in common.
Tip: "Do not use the 'Decimate' modifier for unsubidiving.
This is less accurate and can lead to mismatching edge data and vertex counts."
This can then be done for the resting pose sculpt, as well as all other sculpted shapes. Name the new objects accordingly and save them for later rigging.
Note: Make sure that the correct sculpt layers are enabled on each shape. For example for Einar in Project Heist we enabled the sculpt layers for wrinkles for all shapes and the default shape as well, because they were slightly influencing the form of up to subdivision level 3. Your setup might be different though.
If needed it can be useful to include the original symmetrical base mesh, that was saved from way earlier, in the lineup of exported shapes.
Baking Shape vs Wrinkle Maps
For the displacement map baking we did not bake directly from the Multires modifier. This currently can lead to faulty or even completely inaccurate results.
Instead we baked from a source object (sculpt) to a target object (base level mesh).
The created shape keys are great to use as a target here.
Note: It's important to set the source and target object at the same subdivision level.
For baking the shapes we used the subdivision level 3 to capture every change in the form and silhouette of the face. For this the target object just needs a Subdivision Surface modifier, while we set the Multires level on the source object also to 3.
For any bump maps, like for wrinkle maps and pore details we instead subdivided the objects differently. The source object got a level of 5 or 6, depending on which the highest level for the detail is. The target object will need a displacement modifier with the already baked displacement map of the default resting pose added. This will make sure that on subd level 3 the shape of the source and target match.
After that another subdivision surface modifier is added to subdivide the model another two times. This is to make the target and source objects match in subdivision count for baking.
If this is slowing down the viewport too much it's wise to disable the modifiers for the viewport and only use them in rendering.

With this setup we'll have the base, level 3 and level 5 separated and baked to be combined later on.
Exploding Objects
The workflow of source-to-target baking can lead to baking errors, especially from intersections. In our case by using our own geometry nodes baking setup (More on that in a bit) we don't need to worry about a cage mesh or intersections between the source and the target. What we need to pay attention to is intersections within and among the source objects.
A common way to fix this is to "explode" the objects. This is the practice of moving objects and meshes so far away from another so that they don't affect each other during the baking anymore. Especially for ambient occlusion maps this is very useful.

In our case it's mainly about avoiding intersections in the mesh like closed lips and eyelids, as well as limbs bending in ways that cause self intersections.
The solution here is to add a shape key called "Baking" or "Explode" where we move away the intersecting areas with a very soft falloff. For displacement/normal maps this will lead to no difference in the accuracy of baked maps.
Just make sure to convert the shape key into a sculpt layer for the source object as well and to enable it during baking. Both objects still need to match.
Note: We noticed that the results from mixing sculpt layers can look different than mixing shape keys! So an important advice for very strong or rotational deformations, is to mix the "Explode" and shape sculpt layers together and export them as a single shape key. This shape key should then be the target object to bake to. That will ensure that both have the exact same proportions.
Baking
Now it's time to go deeper into how we baked displacement maps.
Baking with Geometry Nodes
We realized the most accurate way to read the difference between the source and the target topology is to use geometry nodes. You can download the setup we used here:

More information can be found in the file.
This way we were able to read the difference in surface distance, save it as an attribute and add this attribute to the color of an emission shader. The target object can then bake the emission color of the other object.

This worked well but had one big downside. Geometry nodes are only able to read the geometry but not the shading. So the baked result will always be flat shaded.
To counter this we had to increase the subdivisions to 6, no matter what detail level we were baking. To achieve this we just needed to add an additional subdivision surface modifier on the target and source object. But it put a huge memory requirement on the baking process.
An alternative setup that we only worked out late in the production and barely ended up using, is vector displacement.

This definitely necessitates that the topology of the source and target are the same. But the result is much more accurate and captures the smooth shaded result as well.
We didn't extensively test the setup yet for baking shapes but you can download and try it here:

Each baked map was saved into a baking folder for further processing.
Mixing & Fixing
Each shape and detail is easiest to bake separately as they were sculpted. But they still need to be mixed together into shape maps. Some baking errors are also unavoidable and need to be painted out.
Shape Mixing within Blender
In the case of the facial shapes they were already sculpted together, so baking them already lead to the desired results.
But in the case of the clothing shapes it was more complicated. We sculpted each individual deformation as a single sculpt layer. Based on the Grouping we defined earlier on page 4, these still needed to be mixed together.
Doing this in a 2D painting application like Krita can lead to incorrect blending along UV seams. The better way was to do it directly in Blender.

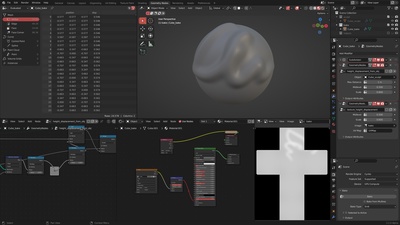
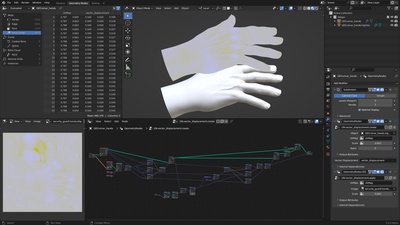
For this we created a material on the base mesh where we imported each baked displacement map. With painted color attributes as masks you can then mix the textures to create the shape map. This can then be baked again to a single texture and exported.
Earlier we mentioned that the torso shapes were sculpted in 4 sculpt layers but will be merged into two shapes. This can be done now by painting color attributes to mask the front, back, left and right side of the lower torso. The 4 textures can then be mixed via the masks to only show stretching or compression on all sides.
Later on during rigging and shading the resulting two shape maps can be applied via the same masks that were used during the mixing here.

Limitations of Clothing Shapes
One unfortunate limitation of or workflow of using shapes instead of simulation for clothing is that only one shape can be used in an area at a time.
For example when the arm is being raised, this will result in very specific wrinkles and deformations. Also twisting the arm at the same time will make it very difficult to show the effect of both. Just adding both displacements on top of each other will look unrealistic.
The proper solution would be to create a unique shape for mixed deformations. But we unfortunately didn't have the time and rendering capacity for the resulting amount of displacement maps and shape keys, so we embraced this limitation.
Fixing Baking Issues in Krita
A likely step to come last is painting out various baking errors. Even if you properly exploded you objects and baked everything correctly, there might still be issues you want to fix.
We did this in Krita by importing all baked shape maps and doing final touch-ups there. Because the baked textures are ideally be 16bit grey-scale images, it can be hard to paint on them and get results that still look good.
So the workflow we used primarily to blend out baking errors is to bake one really good default map without errors as a base, and selectively blend it into the other shapes.