Login to view this content
Join Blender Studio for just €11.50/month and get instant access to all of our training and film assets!

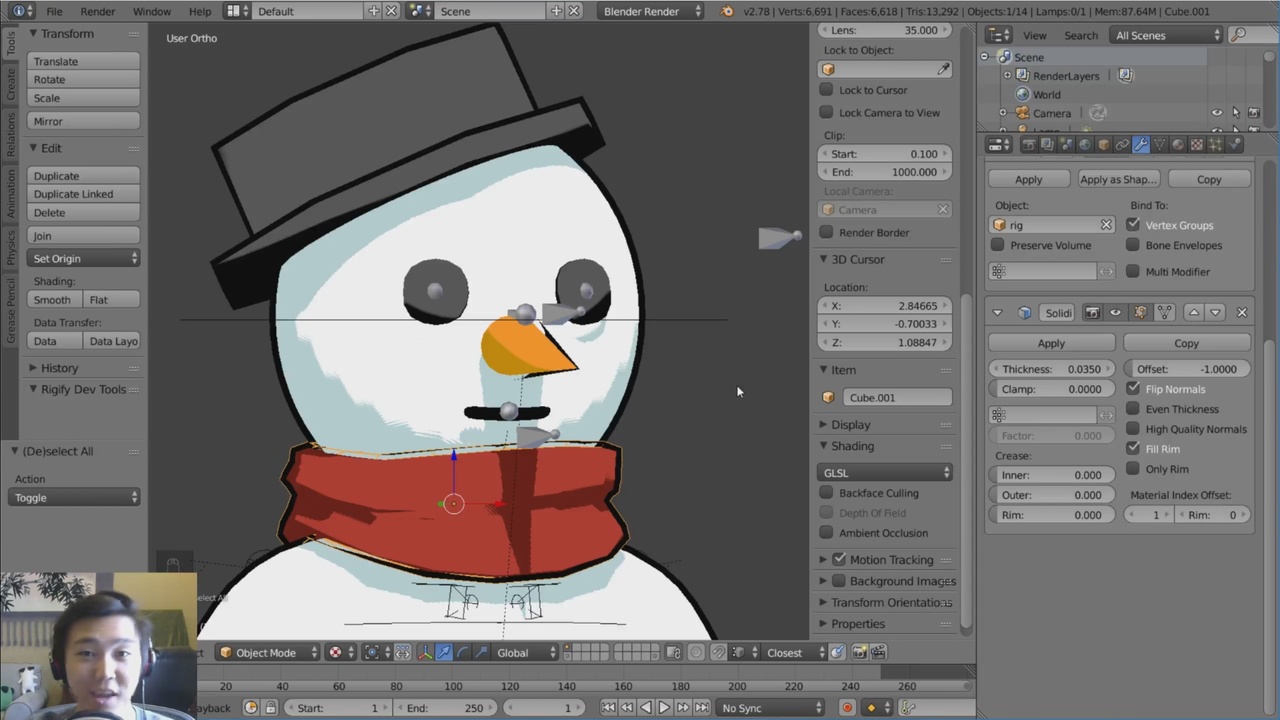
The Outline - Backface Culling
In order to get a nice outline that works from all angles, we will be using a technique called Backface Culling.
7 comments

Golden!

Hi Dillon. Very interesting Tutorial :) Would you recommend this workflow over using Freestyle? I commented on your Attack on Titan parody with cats on YouTube, i really like the very thick Outlines and Shadows you did there, was this achieved with this technique as well? And are you thinking about switching to Cycles anytime soon? :D

@Joel Mayer: Yes, I used this technique for the Attack on Katsu video :) but I used a solidify weight paint to vary the thickness of the lines. You can input a vertex group for the Solidify modifier. And I don't plan to switch to cycles because of how much faster Internal is for this style! Cycles doesn't give you as much control over NPR as internal does at the moment, in my opinion.

Hi Dillon, I'm making my own character (a turtle) but am using the toon shader for a material. However, when I apply the backface culling to the head, it works great; but, it looks very odd on the lips/mouth. I don't know whether it is the vertex arrangement on the mouth or the settings for backface culling that's making it look weird. Do you have a troubleshooting fix for this or at least a way to turn it off for the mouth specifically. Thank you!
@riparun.aj: Yes actually! Many modifiers actually have a vertex group option do assign a "weight" to the modifier. Solidify is no different. You can simply create a vertex group, paint the entire mesh red (full weight of 1), then paint the mouth to have a weight of 0. Then assign this vertex group to the Solidify modifier in the modifier tab. This should do the trick!

Hi Dillon, I am new to Blender. I tried this on one of my renders. In textured mode it looks all right, but when I render, I can't see anything. Can you help me?
@shaishav007: Ah, I see! It might have something to do with your Line Layer material. Did you make sure the material is properly working, and applied using the Solidify Modifier "Offset" option?
Join to leave a comment.