Login to view this content
Join Blender Studio for just €11.50/month and get instant access to all of our training and film assets!

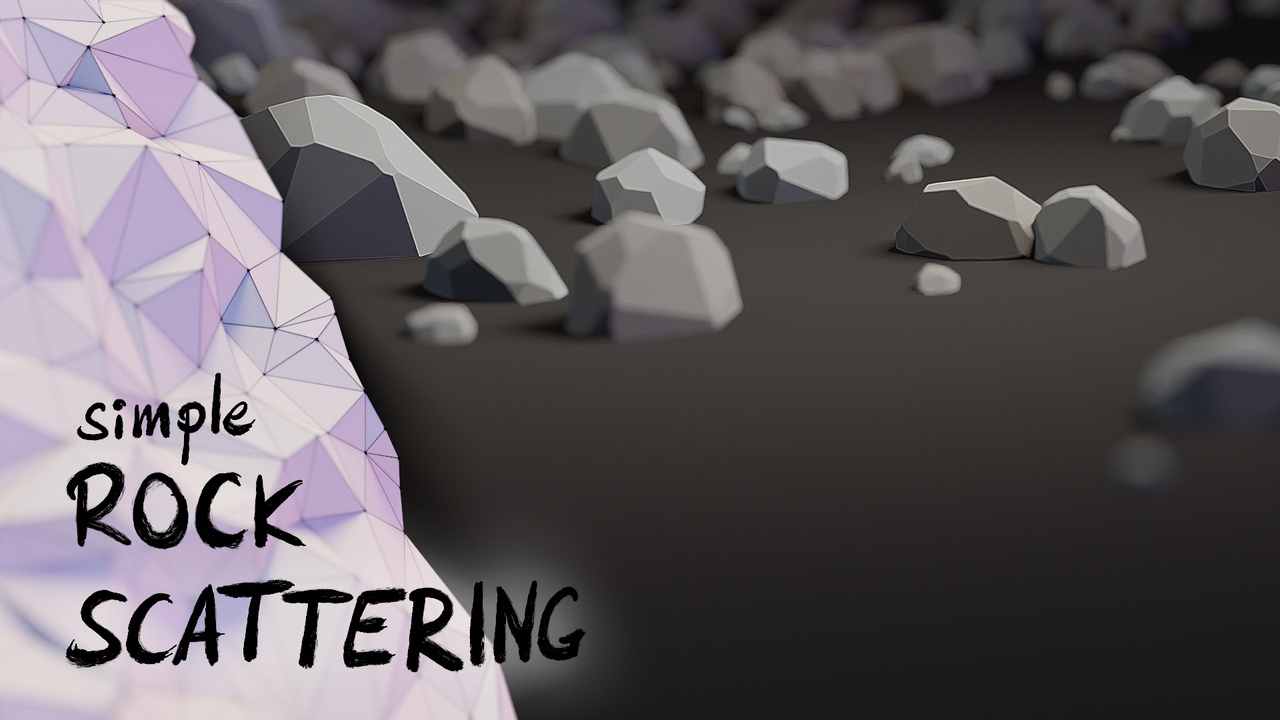
Example - Simple Rock Scattering
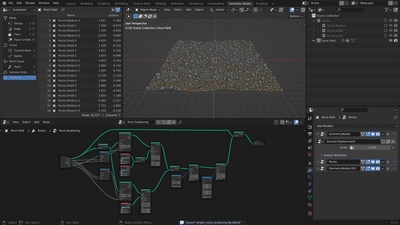
Download the file created in this video here:
67 comments

I expected that set position would work on the entire plane, not for each single vertex.. what i missed?
@Andrea The point of this node is to set the position attribute for every single vertex. If you want to transform a geometry as a whole you need to use the Transform Geometry node.
@Simon Thommes thanks, now it's clear, also the "set position" hint says "set the position of each point". Maybe it would be clearer if the node name was "set points position"?

I also have a video replay issue with this particular video. I can watch it, but not "scrub" it, it just jumps to the beginning of the video. I tried Edge and Chrome. Previous videos work just fine. Submitting report
@Fredrik Buch Interesting, I have the same issue. I poked our web team

@Fredrik Buch this should be fixed now
I also have a video replay issue with this particular video. I can watch it, but not "scrub" it, it just jumps to the beginning of the video. I tried Edge and Chrome. Previous videos work just fine. Submitting report

What is the difference between the Set Position Node, and the Transform Node? and why would we use one instead of the other?
@Christian Leroy The transform node transforms the geometry as a whole. The set position node sets the position attribute for every point.
So the set position node can do deformation, while the transform node can only do transformations. On the other hand the transform node will be much faster if you are actually just transforming the geometry.
Can't find the Scale operation at 4:12 on blender 4.3, any suggestions??
@Remko It's in the vector math node. The search for this only works when dragging from another socket, like in the video.

website videos not working!!!!
website videos not working!!!!
@Sebastian Sullen for me everything is working fine. Please create a report with more information here: https://projects.blender.org/studio/blender-studio/issues/new

Hi Simon,
I'm having an issue at 08:22. I have followed the instructions to the letter but the rocks are not scattering on the plane, they're instead in columns and distant from it. Is this a Blender version issue perhaps?
@Charles-Jean Boucher It shouldn't be the Blender version, you can compare your file to the one provided in the description.
It's a bit hard to say, but your description sounds like you might have not checked the Separate + Reset Children checkboxed in the Collection Info nodes. Or you forgot the Pick Instance toggle in the Instance on Points node.

Hi. I'm using Blender 4.0.2 and the Geometry nodes seem not to be behaving as in your example. Some menus are different, for instance the "N" menu where you rename the sockets of the nodes. Also in this example, I cannot achieve the same results using the same parameters you're using (as far as I can see...) Maybe I'm doing anything wron?

@Alejandro Azadte
I was having problems because I forgot to apply the scale after scaling to 10.
@Alejandro Azadte The user interface has changed in some places since this course was recorded but the overall interaction is still very similar. If you want to follow exactly you can use Blender 3.1 at first.
As to why you are having trouble achieving the same result, that is extremely difficult to tell without more information what that actually means. Working with an object that has a scale transformation that is not 1 is indeed one of the biggest reasons why there would be a different result with the same parameters.

This tutorial is very helpful , I appreciate your efforts in making it.

Great tutorial! I noticed that all the rocks are positioned halfway through the displaced plane. Can we move each instance up by the proper amount to sit on top of the plane?
@Brian Mnichowicz Yes, you could us the point radius to do that approximately. There is currently no way yet to propagate the actual information back to the instance domain, so it's not possible to do this accurately without realizing all the meshes.

It's taken me some effort to figure it out but at 4:07 you have us adding a Scale node that is not as easily accessible in version 4.0.2. I FINALLY figured out that dropping in a Vector Math node and changing its operation to Scale makes it turn into a Scale node. All I'm saying is be careful when you're following tutorials that the instructor is using the same software version you are. If they're not, you might have to do some digging.
@Daniel Wilkinson You can still add the scale node the same way that I'm showing in the video. The crucial part is that you open the search menu by starting to drag a new link from an existing vector socket. If you are just searching for a node in the add node menu the search term 'scale' will not give you this result but the way I'm showing in the video it does.
@Simon Thommes As with all things Blender, there is always more than one way to do anything, and there is always something new to learn. I had not yet learned that dragging a new link from a vector socket would cause that particular behavior. So I thought it would help anyone that adds nodes like me.
@Daniel Wilkinson I recommend doing it this way, because then Blender knows the context of the connection you are making and can filter the search results based on this.
@Daniel Wilkinson I couldn't find scale in 4.2.2 so I used Vector Math - Multiply, which got me a similar result

Great content, thank you.

Nice Tutorial. I like that you teach not only how to get a desired result, but also how to organize your work and make Geometry Nodes more reusable.
@Sebastian Kloch Thank you! Yes, I'm trying to give the entire picture of actually being able to use the concept in a professional environment. I'm glad that's being appreciated!

So helpful!! Best explanation I'm getting the hang of this now

Very good tutorial, ty.

I've tried the object scattering with vertex painting instead of weight painting using pure red (1,0,0), green (0,1,0) and blue (0,0,1). With a math node set to "Greater than", the different color channels are tested whether their values are bigger than 0. However, I discovered that I needed actually a "Threshold" value slightly bigger than 0 (I used 0.0001, just below the "Spreadsheet's" precision) because my objects for the blue painted areas got also displayed in red and green areas with a "Threshold" value of exactly 0 for testing the blue color channel. File can be found here: https://www.dropbox.com/s/zvxnjuf23sd6mbq/Geometry-Nodes_Instancing_with_Vertex-Colors_1Jan2023_7.blend?dl=0
@Ingmar Franz I think this has to do with the data type of the color. When I convert the color attribute back to Byte Color which is the default for vertex colors it seems to work fine without increasing the threshold.
@Simon Thommes Thanks a lot for your answer! So, this surprising result with the "Math Node" is probably a calculation artifact. But how can I know when to use which type of precision. I just found this in the Blender 3.5 Manual (https://docs.blender.org/manual/en/3.5/modeling/meshes/properties/object_data.html#creating-a-new-color-attribute):%C2%A0 Data Type
The data type to represent colors internally.
Color
RGBA color with floating-point precision.
Byte Color
RGBA color with 8-bit precision.
@Ingmar Franz What that means is how much data is stored for each channel of the color. 32bit floating point is 4 times as much data as the byte color (8bit). So you are using up a lot more data but get higher precision. In most cases when you are painting a color map byte color will usually be enough, but when you are working with data where you need accuracy, like normal or position vectors for example. It is better to opt for 32bit.
But regardless of that the issue that you identified might actually be a bug. I'm a bit surprised that this happens, as in theory true 0 should be possible with both types of color and the channels should be independent of each other. My guess is that this is an issue with vertex painting that only manifests itself with the higher precision of 32bit color.
It would be very useful if you could create a bug report via Help - Report a Bug with the file you prepared and describing the issue!
@Simon Thommes Thanks a lot for the explanations. I've created a bug report here: https://developer.blender.org/T103657%C2%A0 PS: I've just realized that creating a bug report from inside Blender automatically enters your system informations. But why doing it the easy way if it can be also done complicated (as I did before) 😉😁.
@Ingmar Franz Thanks for making the report! Yes, that's why that is the way I recommend people to do it. Another tip about that: You can also upload images, videos and files simply with drag'n drop into the text field. Working at the Blender Studio I've made several dozens of reports by now :D
@Simon Thommes Thank you, that's another good tip! My free Dropbox account is just 200 MB from it's maximum limit 😉.

Great tutorial.
In the end, my large rocks were intersecting with my medium/small rocks in some places. Is this a consequence of the way you set up the node tree? If so, do you recommend a way of having them not intersect?
@Joseph Naughton The next video in this series should address this issue, it's taking the same base setup and adding on top of it for a slightly more advanced workflow. You can use the proximity node to remove points that are too close to other points. Just keep in mind that the scale randomization messes with the radius as well.
@Simon Thommes I just watched then realised it was addressed there. Thank you!!

Also, I'm very interested to know how can I measure the computational speed with one node setup to another. Where can I see how much computational time a node tree used (the full created geometry node)?
@David Rivera You have ti enable the Timings overlay in the overlay settings of the node editor. The time that is shown for the group output is an approximation of the total execution time of the node-tree.
Quick question: On (-18:05) - Why wasn't it subdivided using GN?
@David Rivera Not sure what you mean. Are you sure that's the right timestamp?
@Simon Thommes it's on 1:11. When you create the mesh grid.
@David Rivera Ah I see, yes.Part of this setup is that I want to be able to manually draw in a density mask. If you do the subdivision procedurally, that means that the original data that you can actually manually adjust (edit mode etc.), doesn't change. So the resolution of the plane to paint on would be way to low to paint a usable mask.
@Simon Thommes Great. Thank you for the reply. In regards of my other question: How can the user see how "fast" the GN was computed (processed) in time?

Really WOW 😍

I am using Blender 3.2.1 and it seems that it doesn't have the "Scale" Geometry Node anymore. What I did instead was append "Math" node (with "Multiply" operation) followed by another "Combine XYZ" node. My setup was as following: "Float Curve" -> "Combine XYZ" -> "Math" -> "Combine XYZ" -> "Set Position".
And then "Math" node's value attribute allowed me to scale the "hills" on the plane just like in the video.
@Eimantas Vaičiūnas The Scale node is actually just a Vector Math node with its mode set to Scale. It doesn't show up as such in the general node search or the add menu, but when you drag and search from a node link (like I do in the video) the search is more granular, so it will also suggest different modes and in-/outputs of a node.
@Simon Thommes This is a neat trick. Thanks! TIL :)

Thank you for making these tutorials! I was struggling a bit with the fundamentals of Geo Nodes, but I feel like I'm starting to understand more now thanks to your tutorials.

Thanks Simon for the course, is there any specific reason why did you separate the terrain deformation from the rock scattering into two geometry nodes?
@claudio Silberman It's good practice to separate logical steps that have value on their own into individual node trees. That means you can use them in isolation on other objects and while working you can disable/exchange them easily without having to shuffle nodes around.
@Simon Thommes thanks, and I also saw in the next chapter that you use multiple set position and by having the scattering in a different node it's always on the surface

Oh my gosh.. when you named the node tree rock scattering twice I had to rewind so many times because I thought I was missing something! lol so funny.. Great video.
@Nicholas Cliffe Oh, I must have messed that up in editing, my bad

Wow Simon! Given the fact that you made this example digestible all the way through is something to appreciate. This is the best tutorial I've seen on geometry nodes so far. Really god job. Bravo!

I downloaded the example file, but it seems to come up as the Blender default scene. Do I need a special version of Blender? I'm running 3.1.2 right now.
@Paul Spooner Blender 3.1.2 is also what I have been using for the files of this course. For me the downloaded file works just fine in that version. I re-uploaded the file to be sure. Right now I don't see areason why it would behave like that for you. Can you try again?And do you get any error messages from Blender?
@Simon Thommes The problem was on my Linux box. Just opened it in 3.0.0 on Win10 and it worked fine. Clean installed 3.1.2 and that worked too. Guess the problem is with my Linux system, or the download didn't finish. Will take a look this afternoon.
@Paul Spooner Turns out the download on my Linux box was 110 Bytes, so looks like that was the problem. I just figured you had a super optimized save file! Downloaded the full 1.8 MB and it worked fine. Thanks!
Join to leave a comment.