On this page
Kitsu
We have been using Kitsu as task and asset manager for our productions. It runs at kitsu.blender.studio.
The following doc describes how we use it at the Blender Studio, which may of course differ from other studios.
Getting started
General documentation: https://kitsu.cg-wire.com/
Connection
Everyone has to get a personal profile. Once you are registered as a user:
login: your email addresspassword: default (for the 1st connection only)
Each user is assigned a type of profile that gives specific accesses and rights.
- Artist: has access only to the projects they’re assigned to, can only update/react to tasks they are assigned to
- Supervisor: has access only to the projects they’re assigned to, can update/react only to the Departments they are assigned to.
- Production Manager: has all access to all the projects and can create new ones
- Studio Manager: has all access to every project and Kitsu parameters
- Clientto see (to define in general settings) and can only interact in a limited way. Depending on the settings, their comments can be subject to approval before being published.
- Vendor: partner studio, they have similar permissions to the artists but they see only the tasks they are assigned to.
Creating a new profile
The People page lists every account that exists, active or not. You can see the names, emails, roles and Departments. 
On the top right you'll find the "Add User" button. From there, fill in the form: 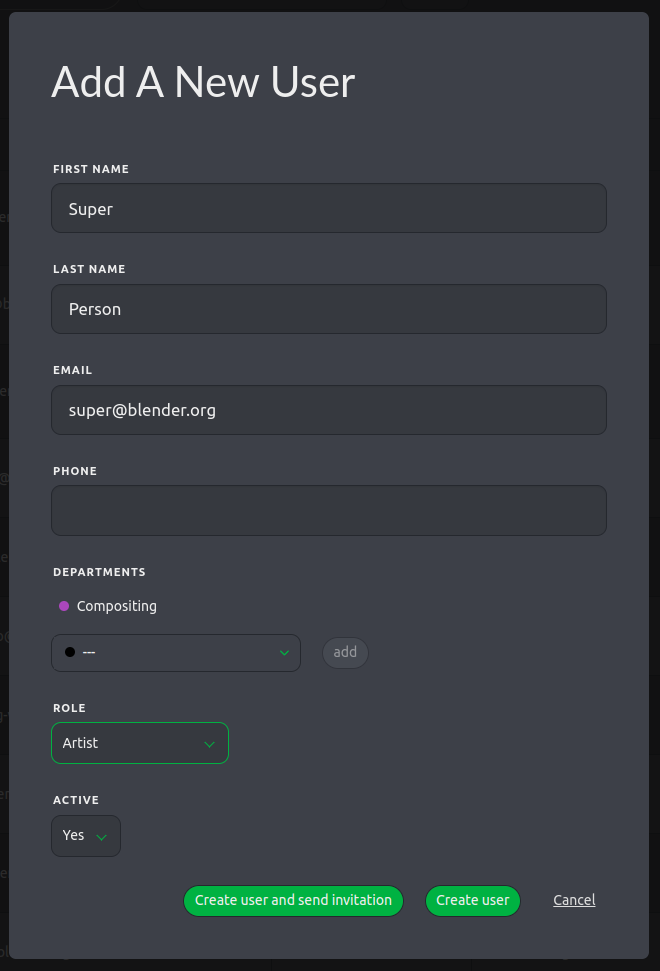
The role chosen will be key as it gives different types of accesses: 
Departments will give info to the other people managing projects (very useful when you don't know everyone and have to go through the list), as well as restrict Artists' and Supervisors' access to only their projects and their departments' tasks: 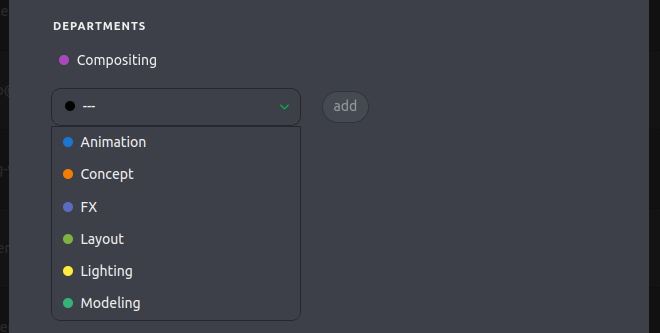
Then create the user, send invitation or give the 'How to' to your new team member!
Main principles
Kitsu provides a platform for users to manage and collaborate on projects. It is organized around projects, which are created and managed by Production Managers and Studio Managers. Users are assigned to projects and given access to specific tasks and assets.
Kitsu includes features such as statuses, asset types, assets, shots, playlists, notifications, and newsfeed. Users can follow updates on a project through these features. Kitsu also includes an overview info section, which provides a summary of the project.
Main page

Statuses
Here is the list of statuses we have created at the studio, and their function: 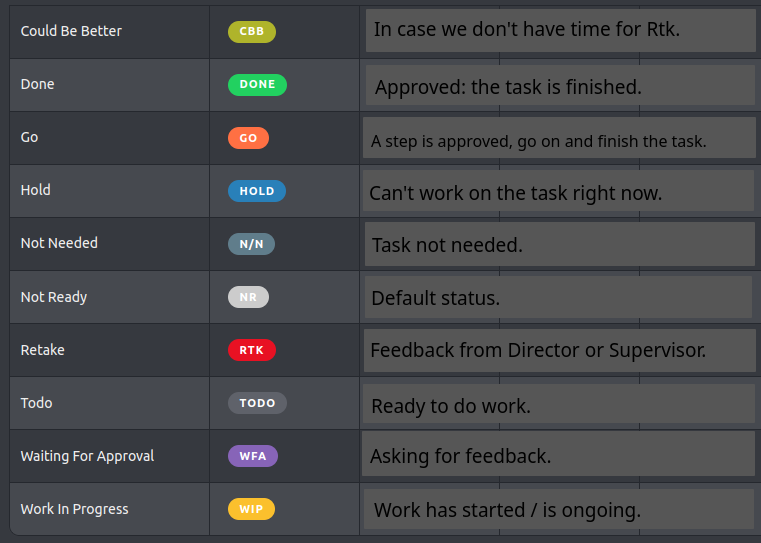
Usual cycle of approval
NR → TODO → WIP (artist starts working) → WFA (artist shows director/supervisor)
→ DONE (task is approved)
→ GO (first step is approved, go on to finish the task. E.g. blocking then splining)
→ artist puts it in WFA again, for another cycle
→ RTK (feedback to be applied)
→ artist puts it in WFA again, for another cycle
Asset Types
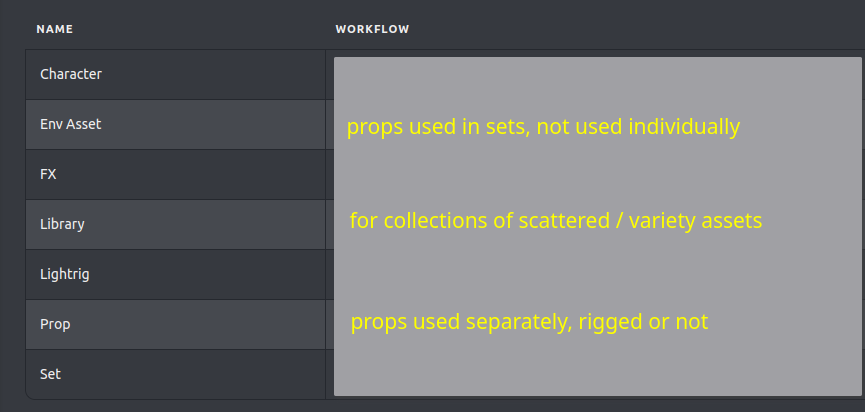
We created different Types of Assets to organize them on the page (they show in categories) and apply different Tasks to each type.
Example: Characters will need Concept, Modeling, Sculpting, Rigging, Shading and Anim Test but FX will need Concept, Shading and Anim Test, or Props will only need Concept, Modeling, Shading and Rigging.
 (This image is an old version - to be updated)
Tasks
Kitsu is organized around Tasks, which we create as we need them. They will form the columns on the Asset and Shot pages.
Each task is linked to a Department - people too can be linked to one or several Department. This allows to group things and adapt the interface to only show one specific department, if that’s useful. In the images below, those departments are symbolized by the colored dot on the left of each task.
Those tasks each have a color and can be selected and put in a different order on each project; see Settings.
For Assets: 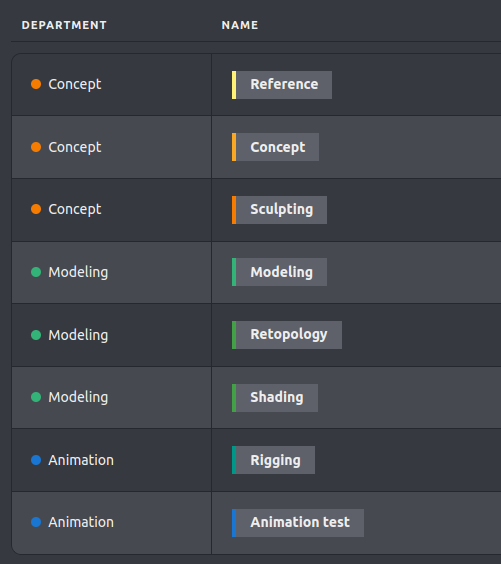
For Shots: 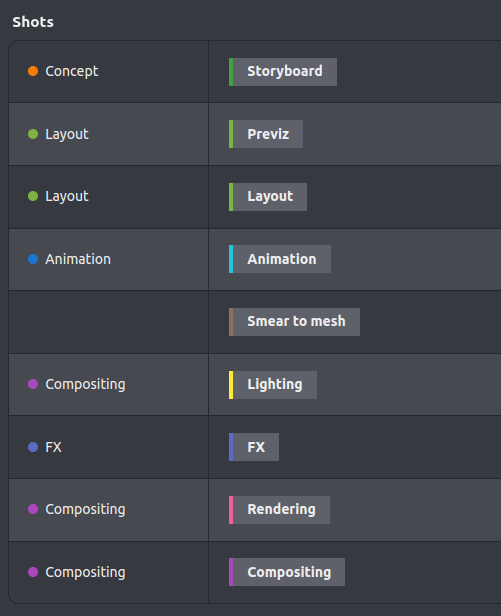
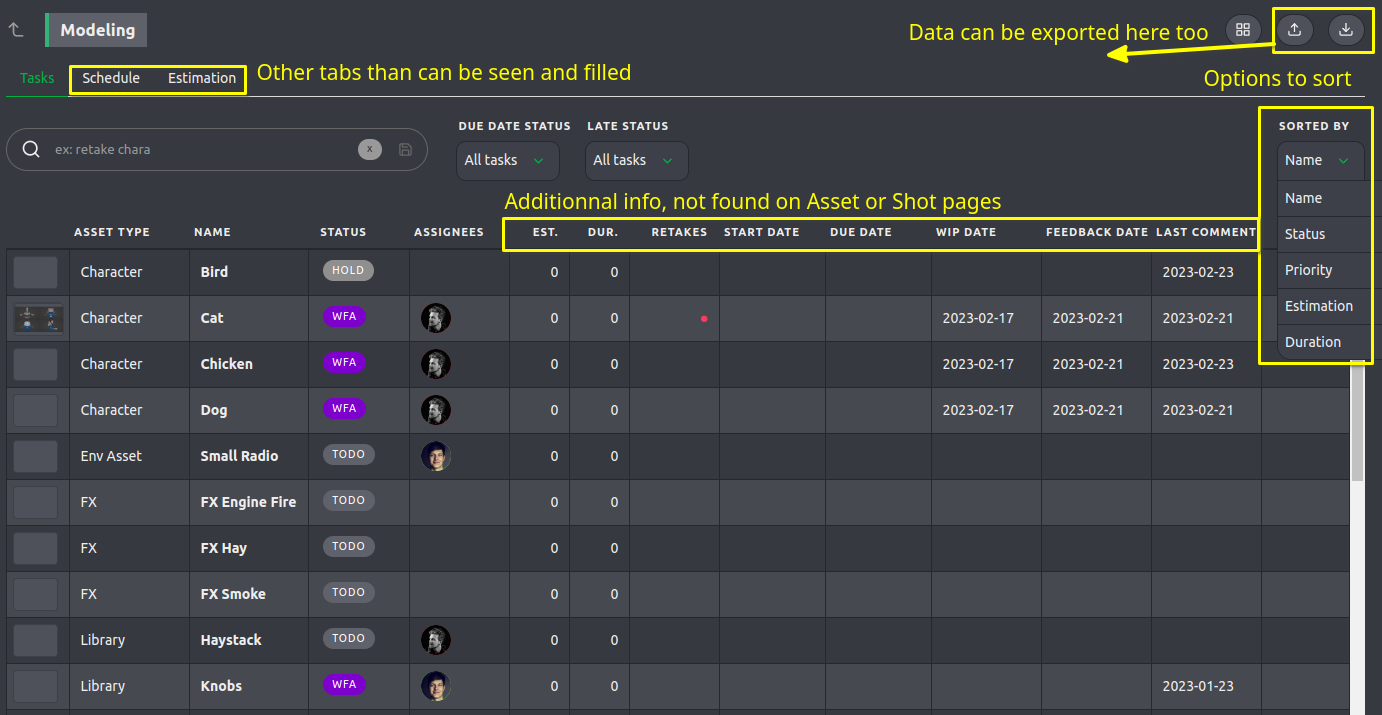
Apart from the Assets and Shots pages, we have access to each Task of a project if we click on the name at the top of a column: it opens a new page with more info (retake count,... ) and filter options.
This is especially useful when we want to put in estimates (for the time to spend on a task), deadlines, or work on the Schedule Tab.
Example of the schedule used in animation on Pet Projects, for shots not approved yet: 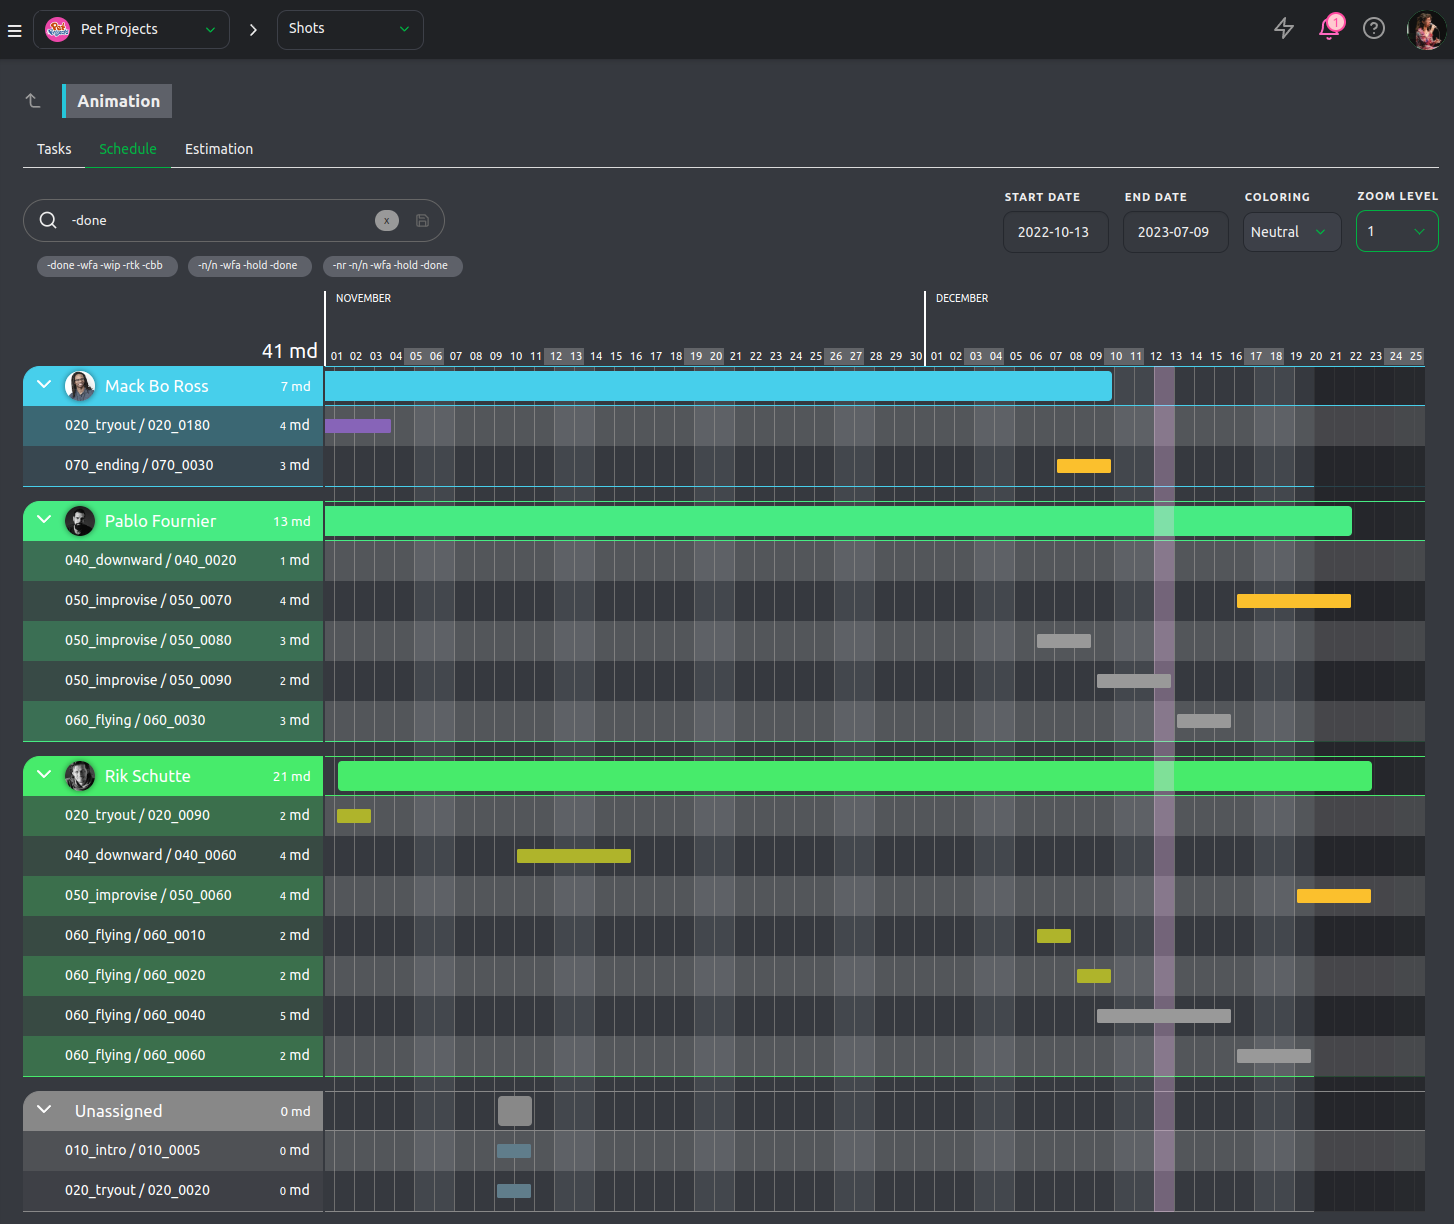
Search bars

On almost every page, you will find a search bar. This is dynamic (no need to press Enter, unless you want to save the search parameters) and works on this principle:
task=statustask=-status(shows every task that does not have that status)assettypee.g.: to be written
By default, every Statuses and Tasks are included, but each project can select those it needs.
Importing data with .csv files
On each Assets page, Shots page or Task Page you can import a .csv file. This allows for rapid ingestion and creation of Assets or Shots.
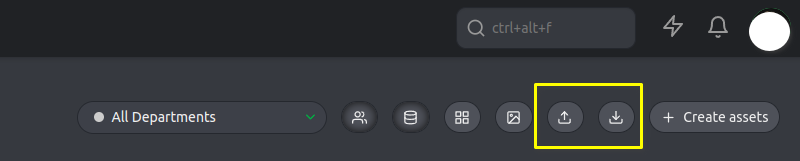
You can then download all this data again, which gives you a .csv file with all the info on the page (including assignations and current status)
→ this is especially useful if we want to do statistics or follow quotas
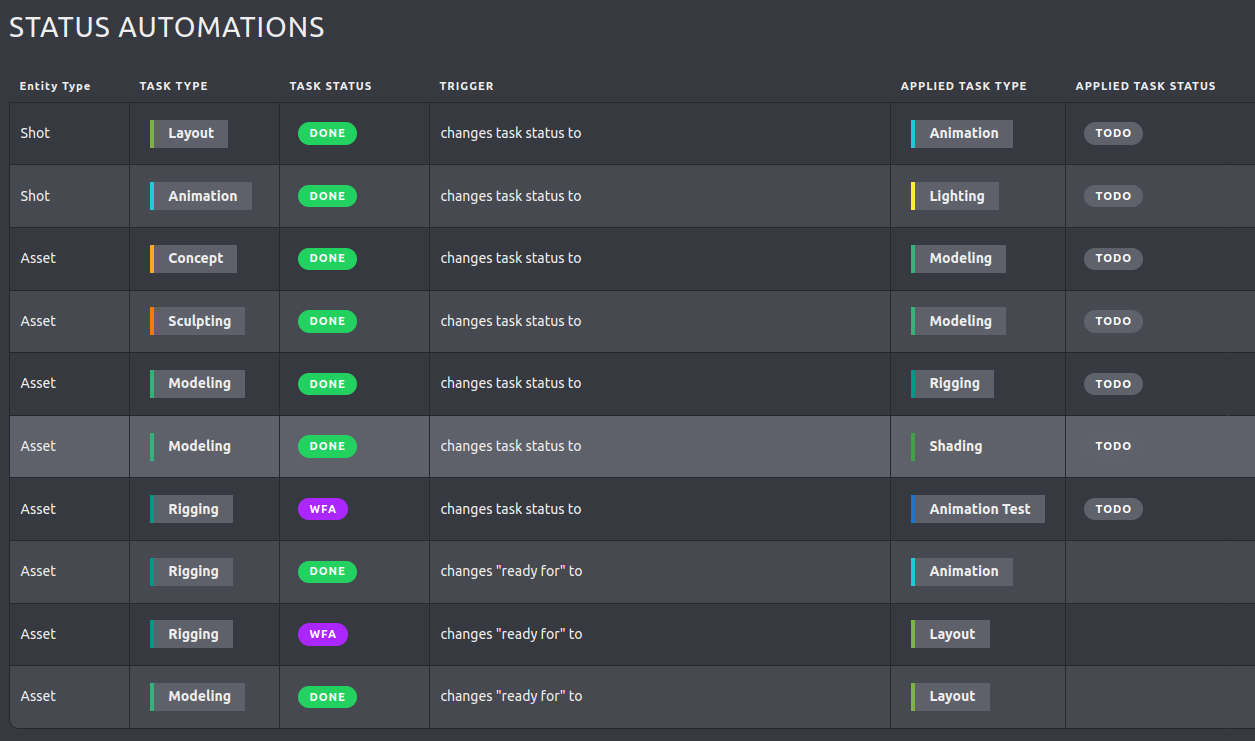
Status Automations
Trigger automatic changes to make the workflow more efficient. The automations have to be added on each project, depending on our needs.
Assets
to be written
Shots
to be written
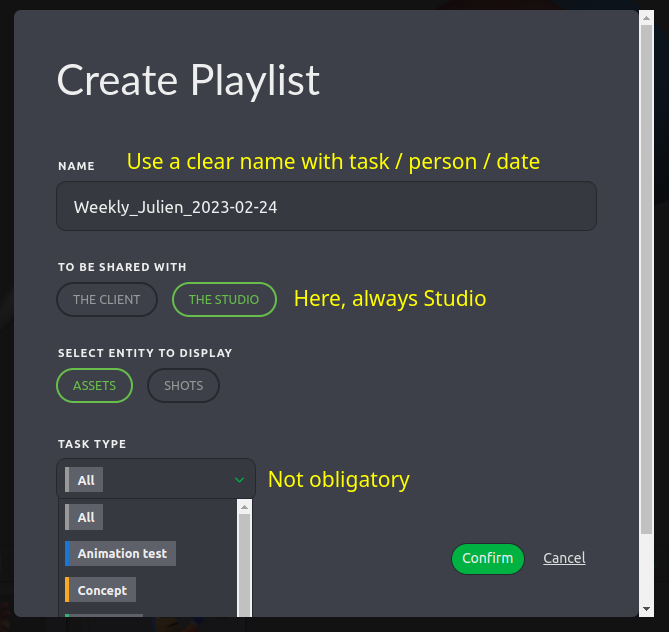
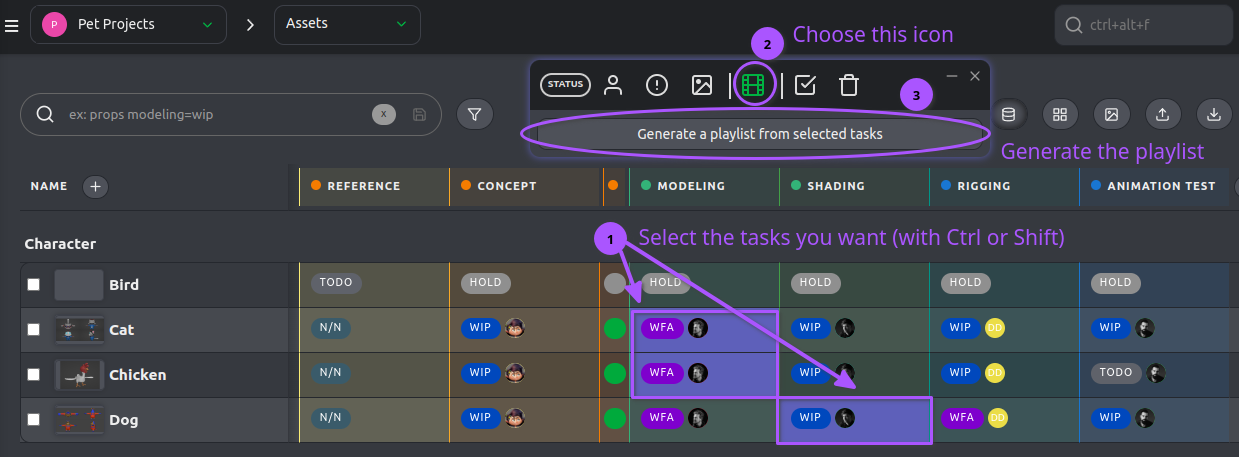
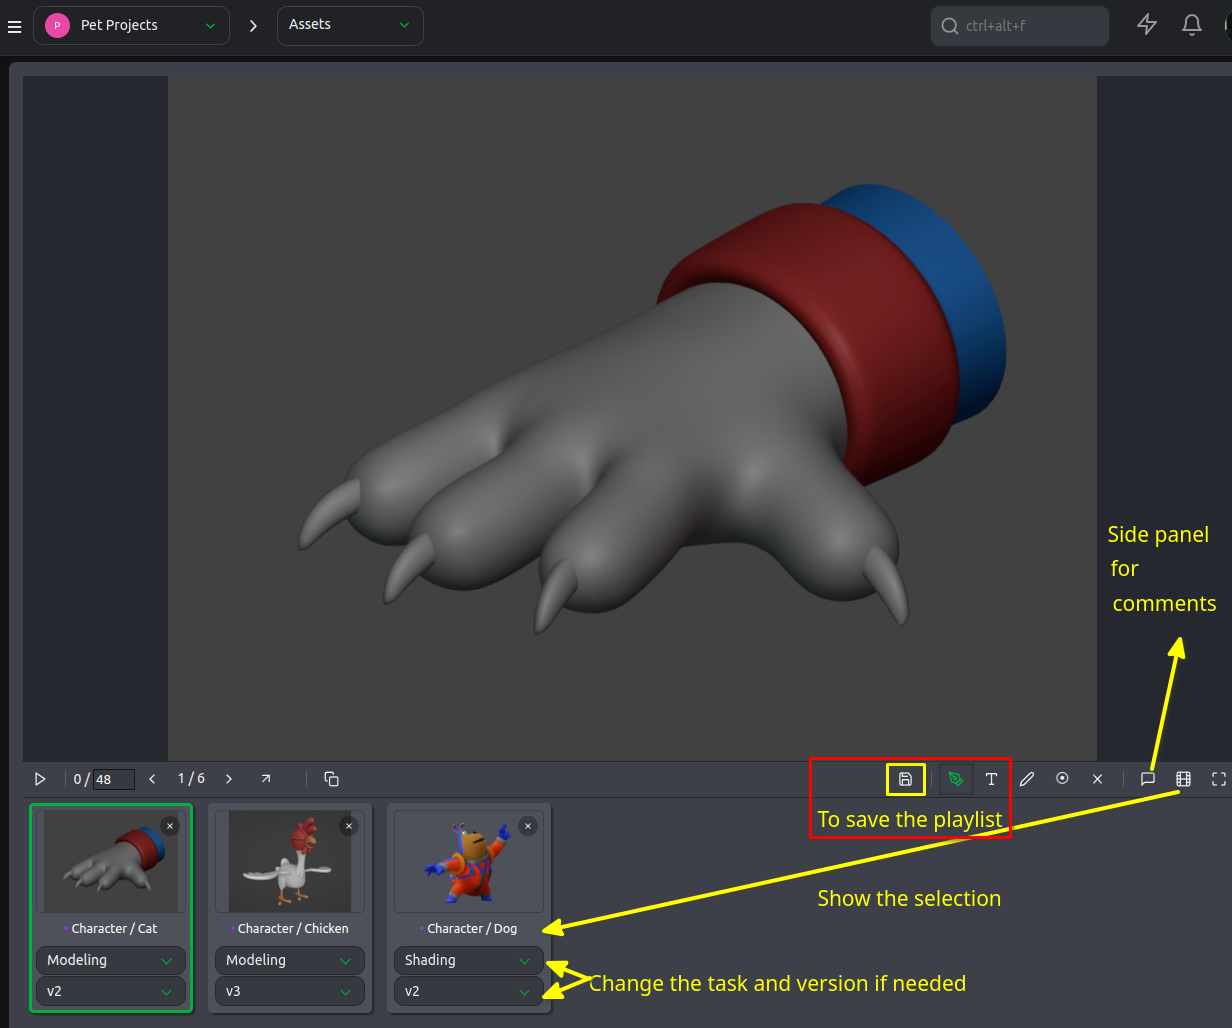
Playlists
There are 2 ways to create playlists:
Playlist page
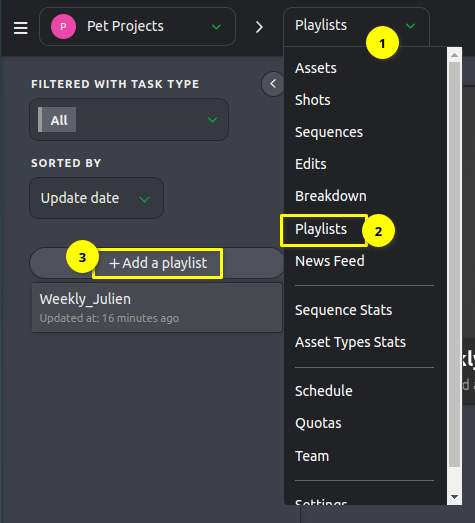
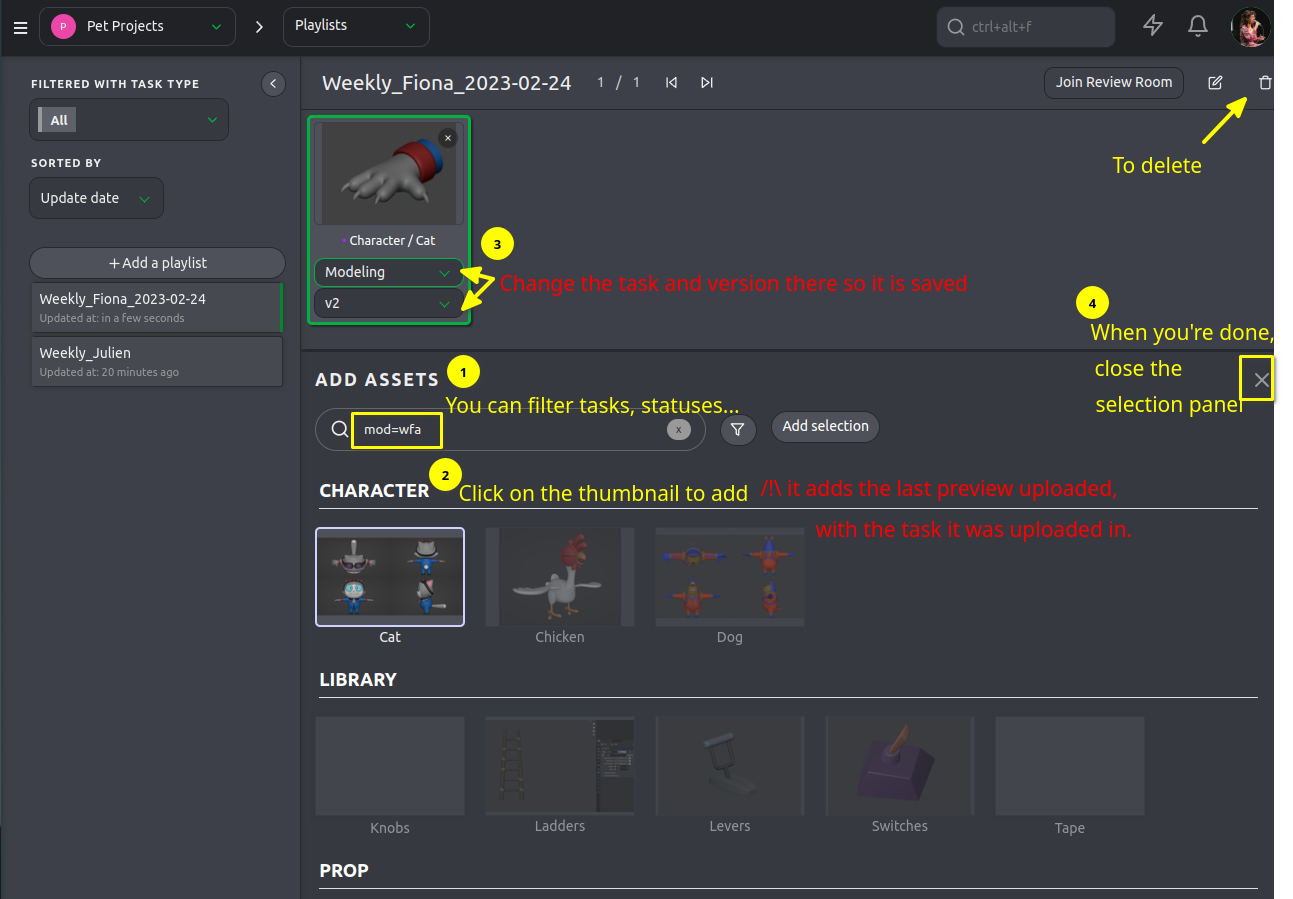
Playlists on the fly
Directly on the Assets or Shots page, you can select tasks:
Following the updates
Notifications
The bell on the top right. This shows notifications for your particular user, when you've been tagged in a comment or for Tasks you are assigned to.
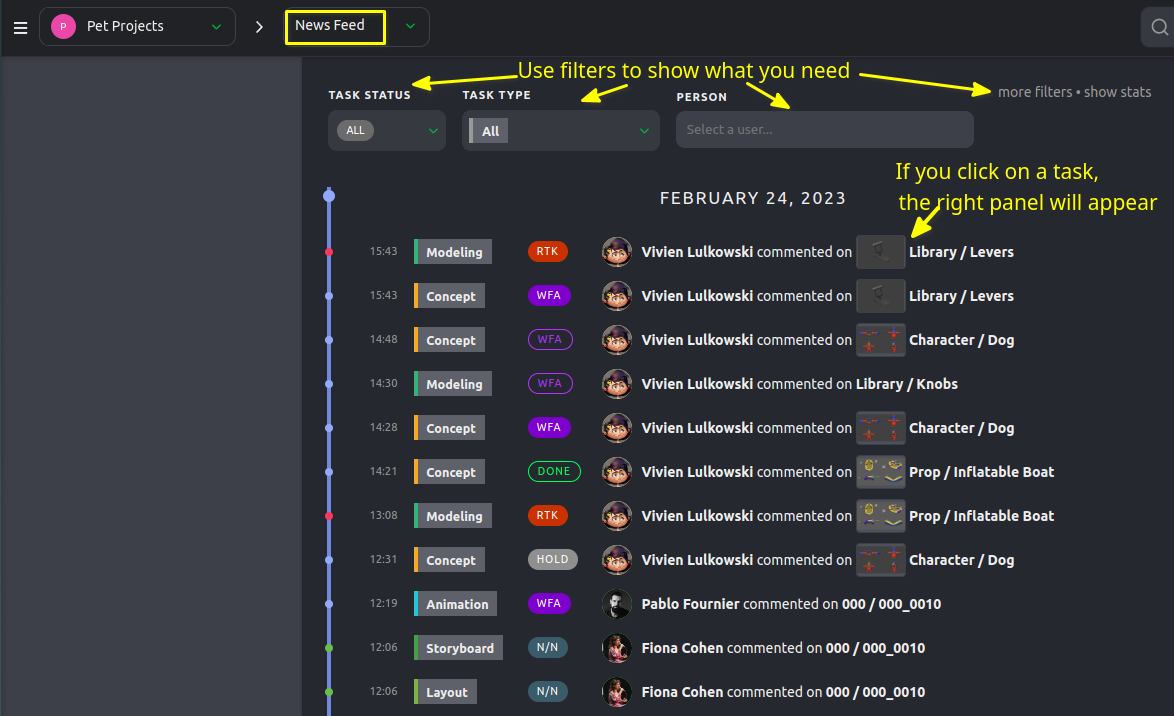
News Feed page
Very useful to check what people have been up to on a project.
For example, look for everything that has been approved (DONE) or put on RTK, or only RIG tasks. Or look for only one person in particular.
Overview info
The pages Asset Type Stats or Sequence Stats: can be downloaded as .csv files too.
Here with the pie chart view: 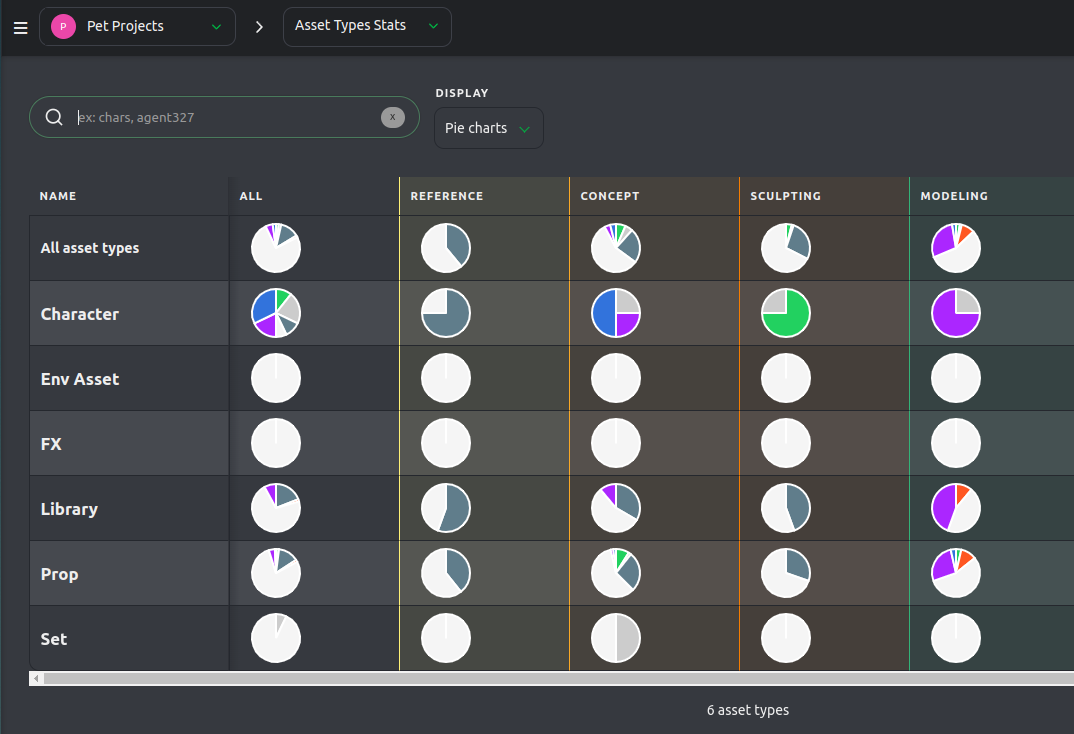
Here with the numbers showing: 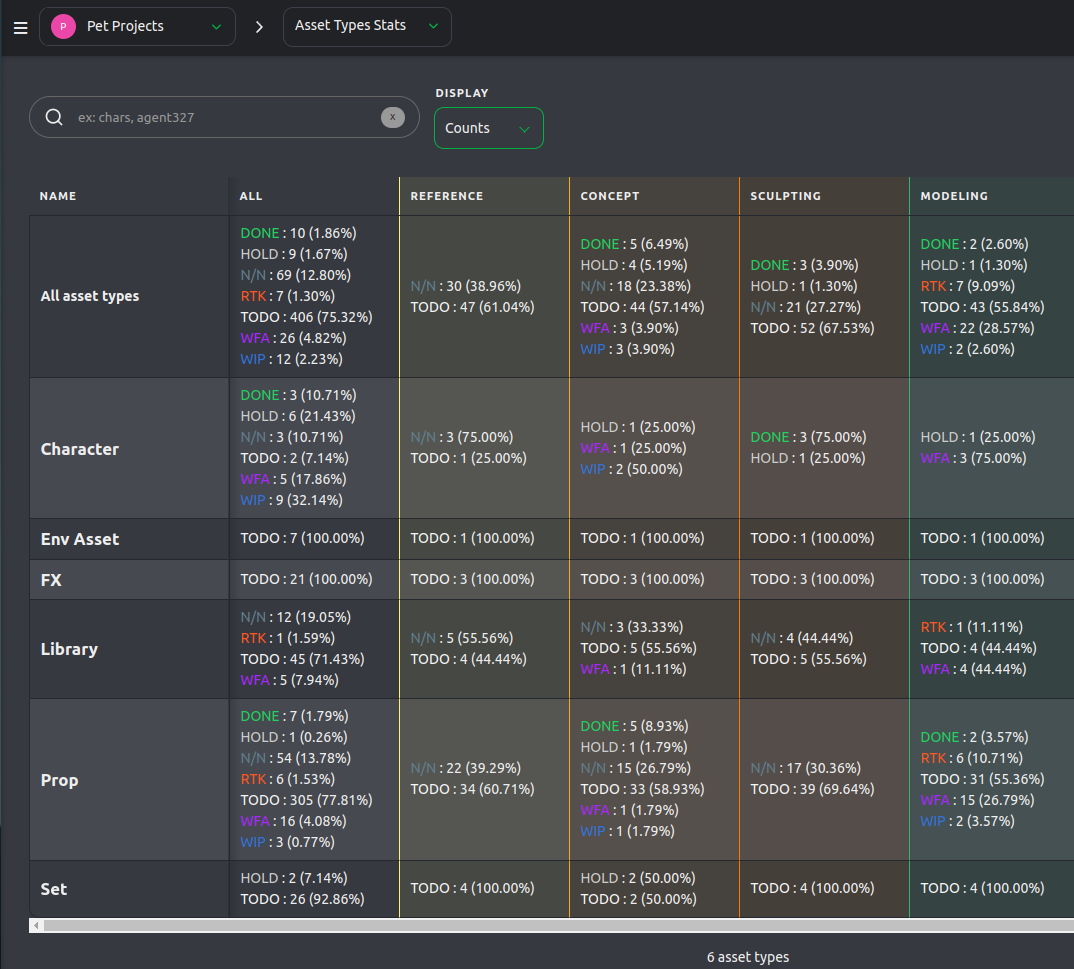
Setting up a new project
Main info
Studio Managers and Production Managers can access the "Create a new production" page through the main page or the My productions page.
There, you'll find many information to fill in: 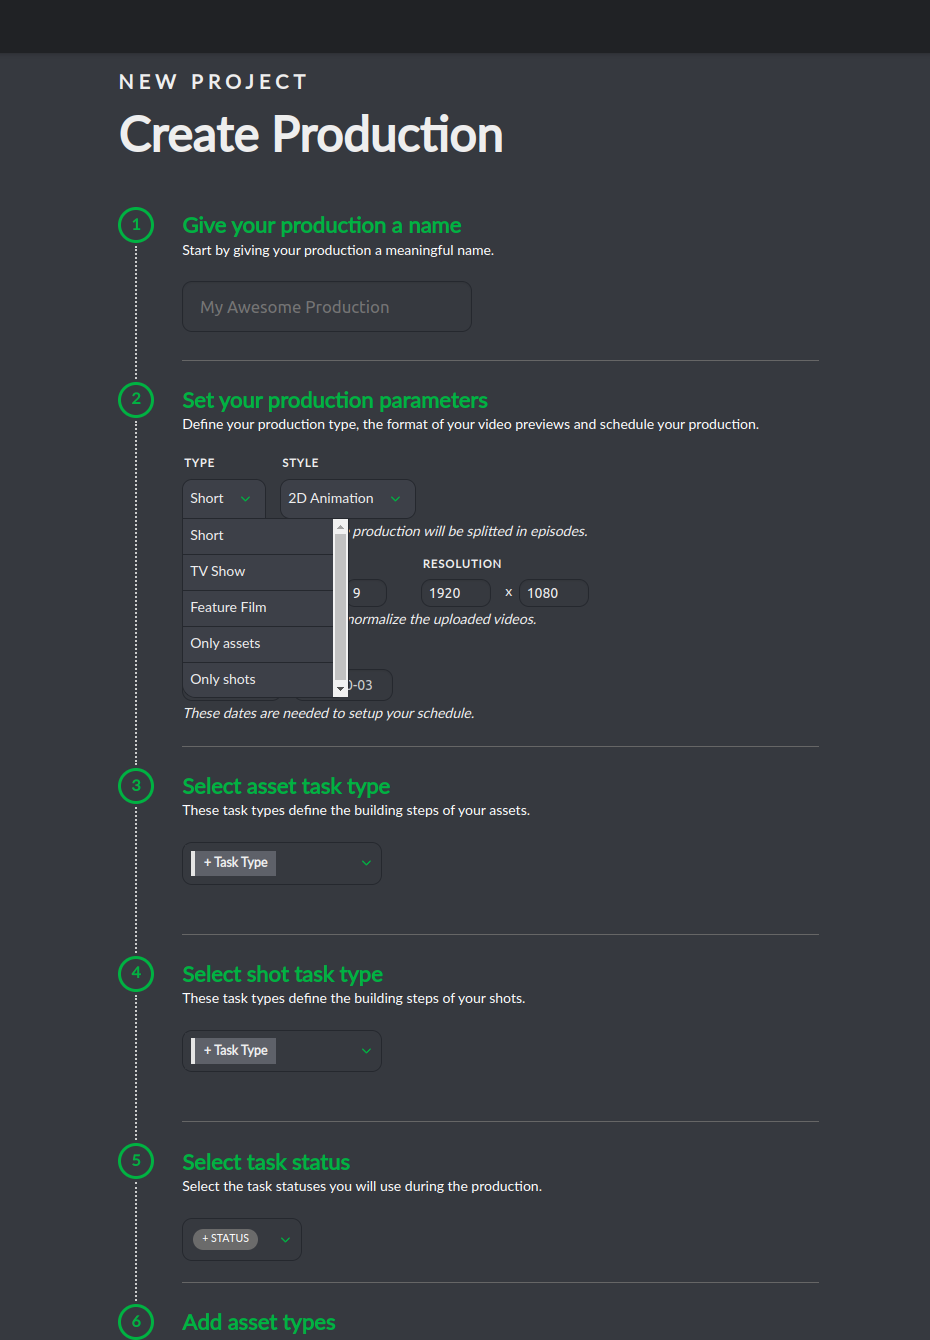
All categories need to be filled with at least one item. The most important will be "2 - Parameters" as the Type of project will set up a different array of technical parameters; a series will have multiple episodes, a feature will have a more robust data mangement than a short film.
More settings
Parameters
You can add more info, a brief and even update the picture: 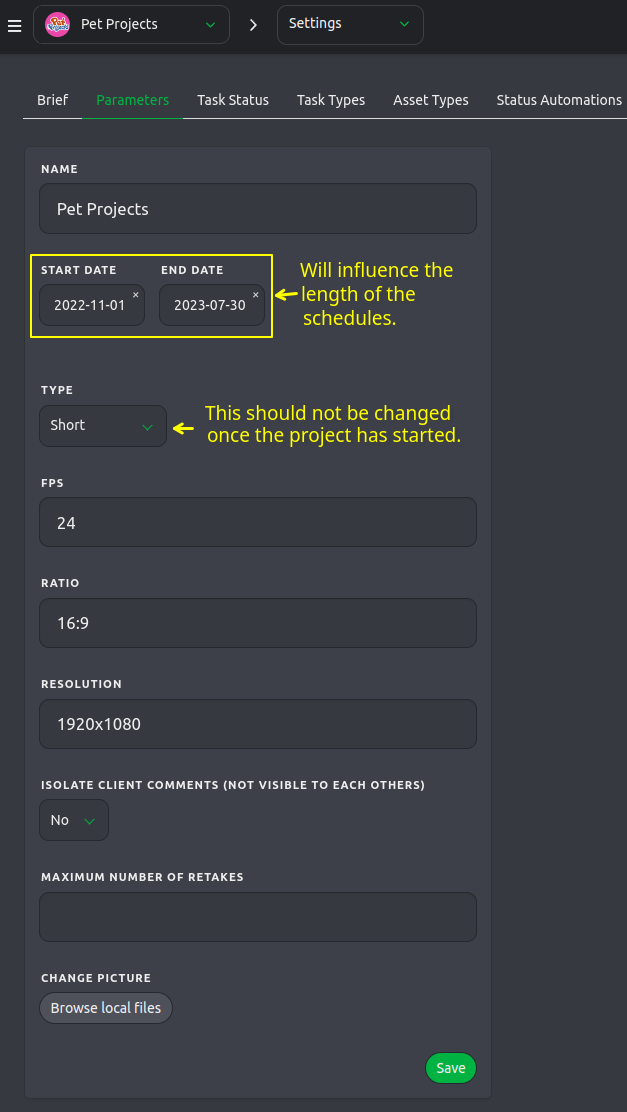
Adding people
Once your project is created, you need to assign people to it so they can see it and interact on the different pages. For that, go to the Team page.
This is especially true for Supervisors and Artists who cannot see productions they are not assigned to. 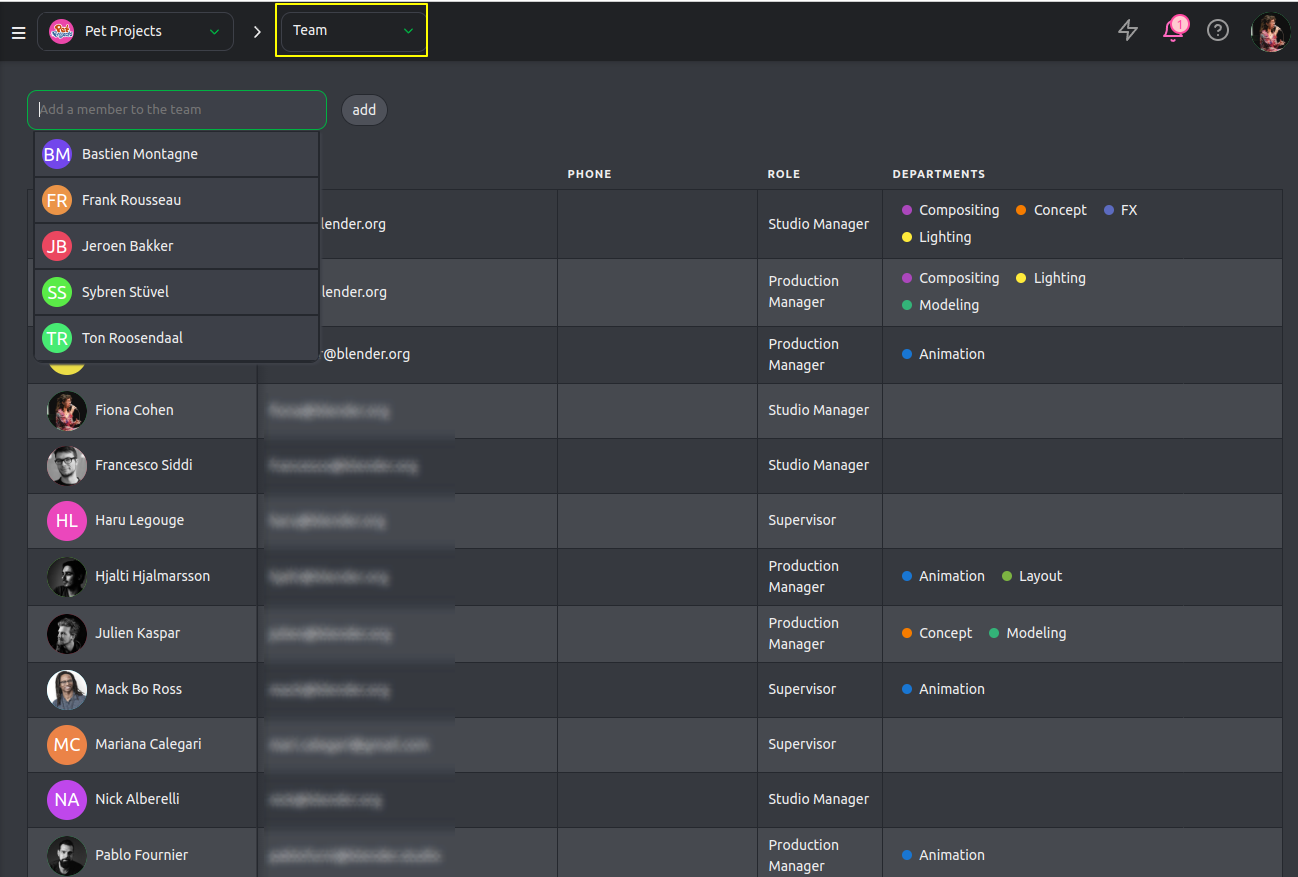
Tasks, Statuses and Asset Types
As mentioned before, by default all tasks ans statuses are available in a project. If you wish to define stricter parameters, you can do so in the settings.
For each tab, the system is the same: you chose what to add from a drop-down list.
Tasks can be ordered, per project: 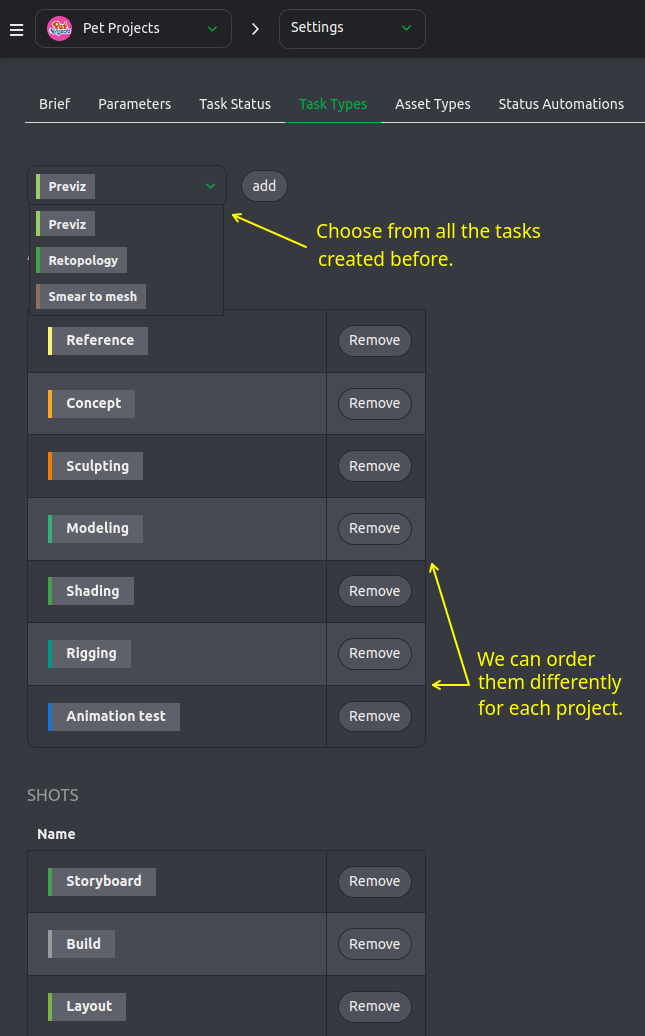
In the example below, we chose to use all the Statuses existing in our Kitsu: 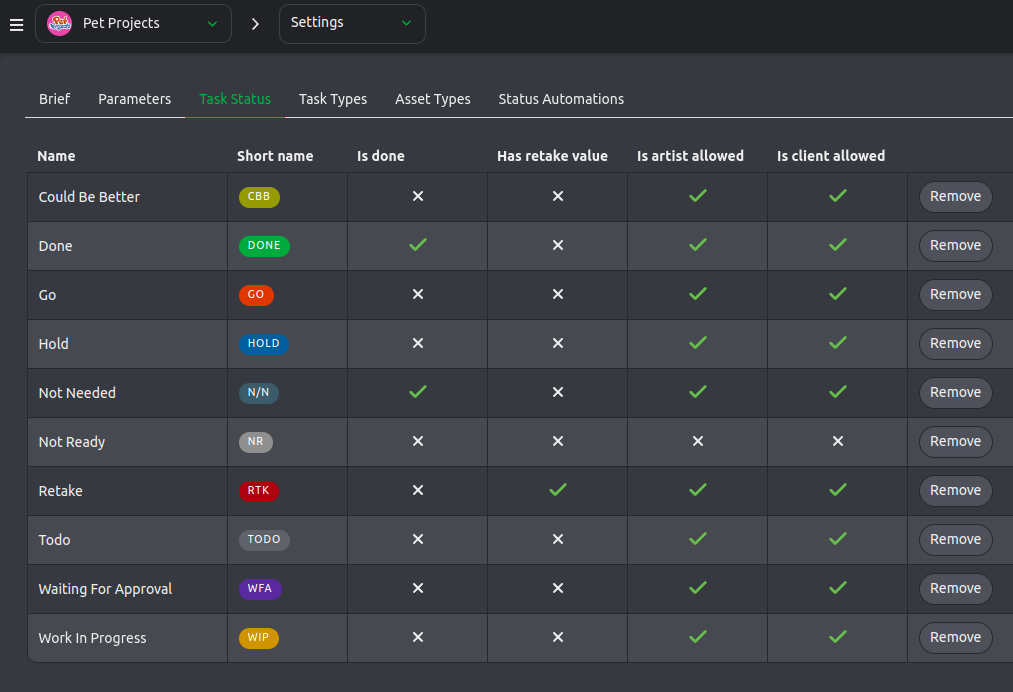
For Asset Types: 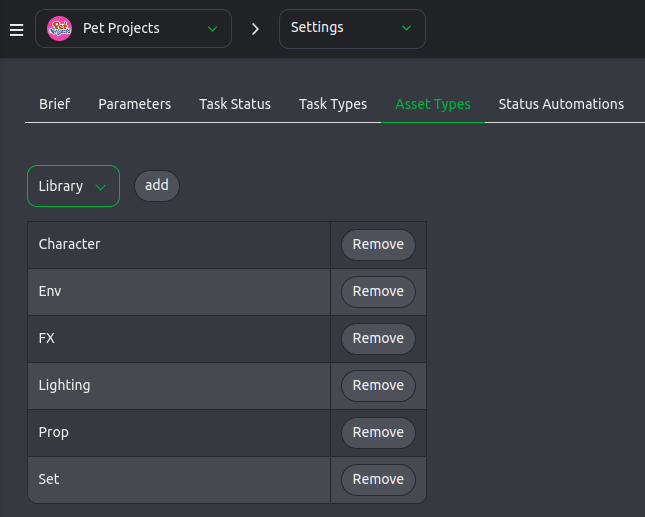
Automations
As for other parameters, Automations can be added from a list of those existing in the global Kitsu: 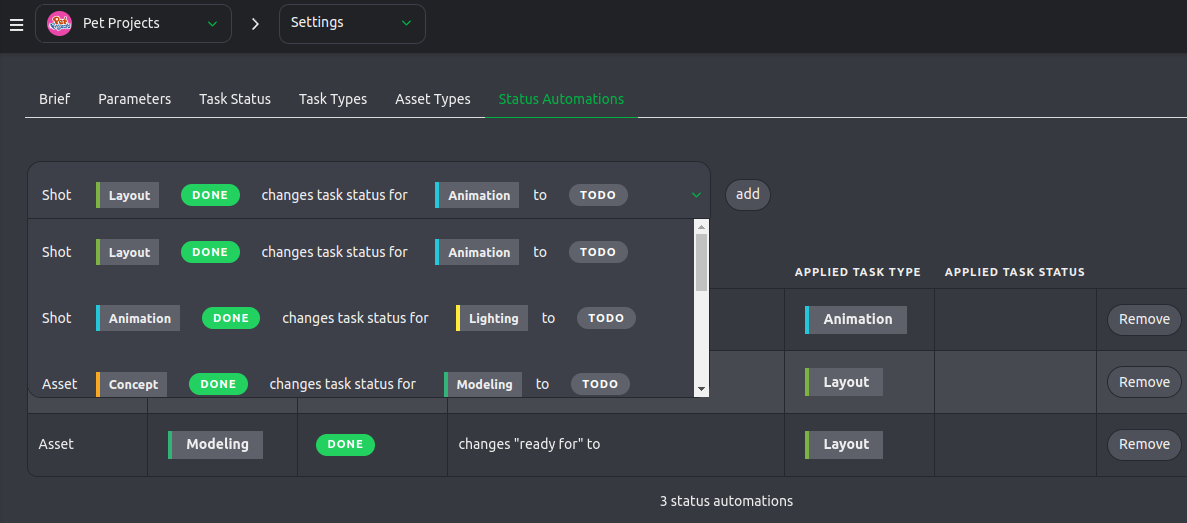
Creating tasks
to be written
Importing data
to be written