Syncthing Setup
Install Syncthing
The Blender Studio Pipeline relies on Syncthing to sync large files like renders and playblasts used in production. This guide will show you how to install Syncthing on a workstation, assuming you already have a Syncthing server set up. To learn more about how to set up a shared server, visit the Syncthing Documentation.
Linux/Mac
Debian/Ubuntu
Install the latest Syncthing packages via the official Syncthing Repository.
Other Linux Distributions
Get the latest release for your distribution.
Windows
Syncthing can be installed on Windows with the official Syncthing Installer by following this video, but it is recommended for novice users to use the community-contributed package SyncTrayzor.
Download and install the latest version of SyncTrayzor.
Setup Syncthing
Launch the Syncthing Web GUI:
- Browser: The default address for the web GUI is
127.0.0.1:8384 - Linux: Find "Syncthing Web UI" in the application launcher
- Windows: Right-click the SyncTrayzor icon in the system tray and select
Open SyncTrayzor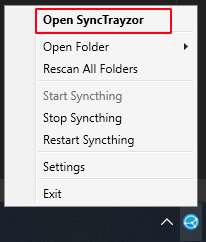
- Browser: The default address for the web GUI is
Select
+ Add Remote Deviceand enter the Device ID of the Syncthing server.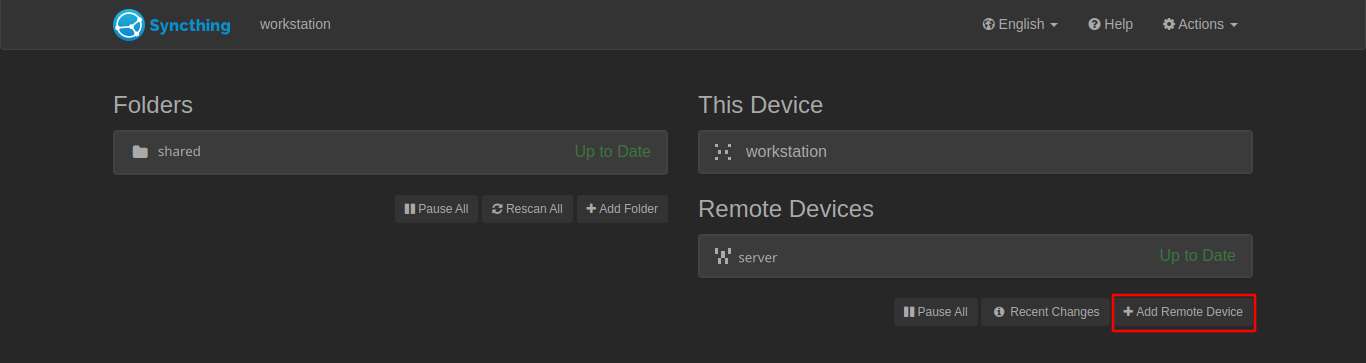
On the server's Web GUI, select
+ Add Devicefrom the "New Device" pop-up.
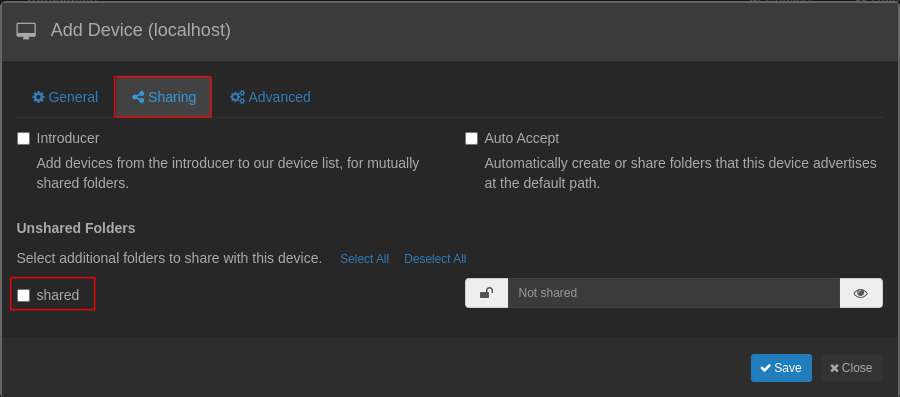
In the "Add Device" pop-up, under "Sharing," select the folder(s) to share.
Return to the client's Web GUI and select
Addfrom the "New Folder" pop-up.
Enter the following path under Folder Path:
~/data/your_project_name/shared.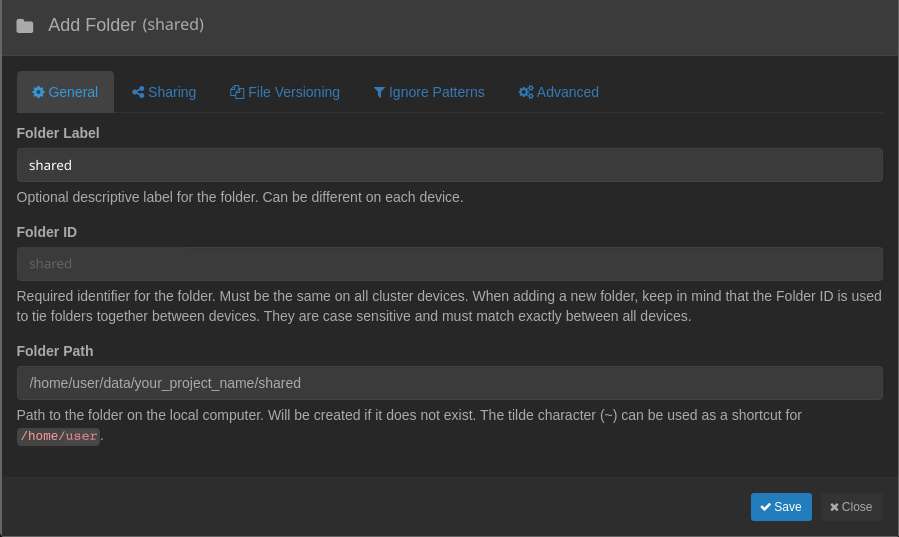 The tilde "~" will be replaced with the home path for your operating system.
Select save to begin syncing your "Shared" folder.