Easy Weight
Easy Weight is an add-on focused on quality of life improvements for weight painting in Blender.
Installation
Easy Weight can be found on the Extensions Platform, meaning you can simply search for it in Blender.
Features
Easy Weight allows you to control some scene-level tool settings at the user preference level. You can find these in the add-on's preferences.
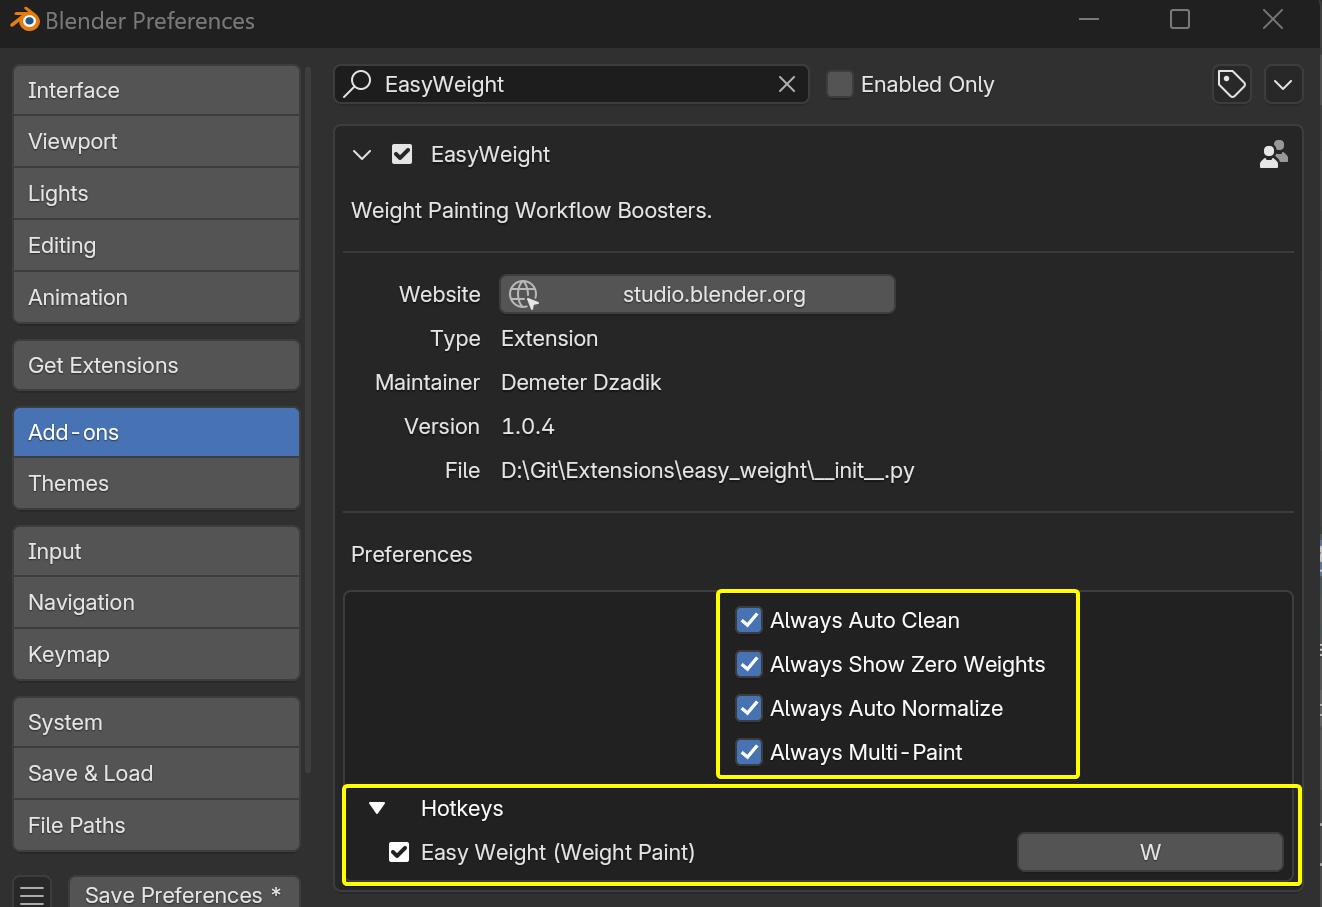
- Easy Weight Paint Mode: You don't have to reveal or select the armature to enter weight paint mode. The add-on will take care of it for you.
- Always Auto-Clean: A new feature in the add-on which cleans zero-weights after each brush stroke, and automatically ensures opposite side vertex groups when using a Mirror Modifier.
- Always Show Zero Weights: Forces Blender's Show Zero Weights overlay option to "Active".
- Always Auto Normalize: Forces Blender's Auto-Normalize setting to be always on.
- Always Multi-Paint: Forces Blender's Multi-Paint setting to be always on.
Weight Paint Pie (W)
On the W key you'll find a handy nested pie menu: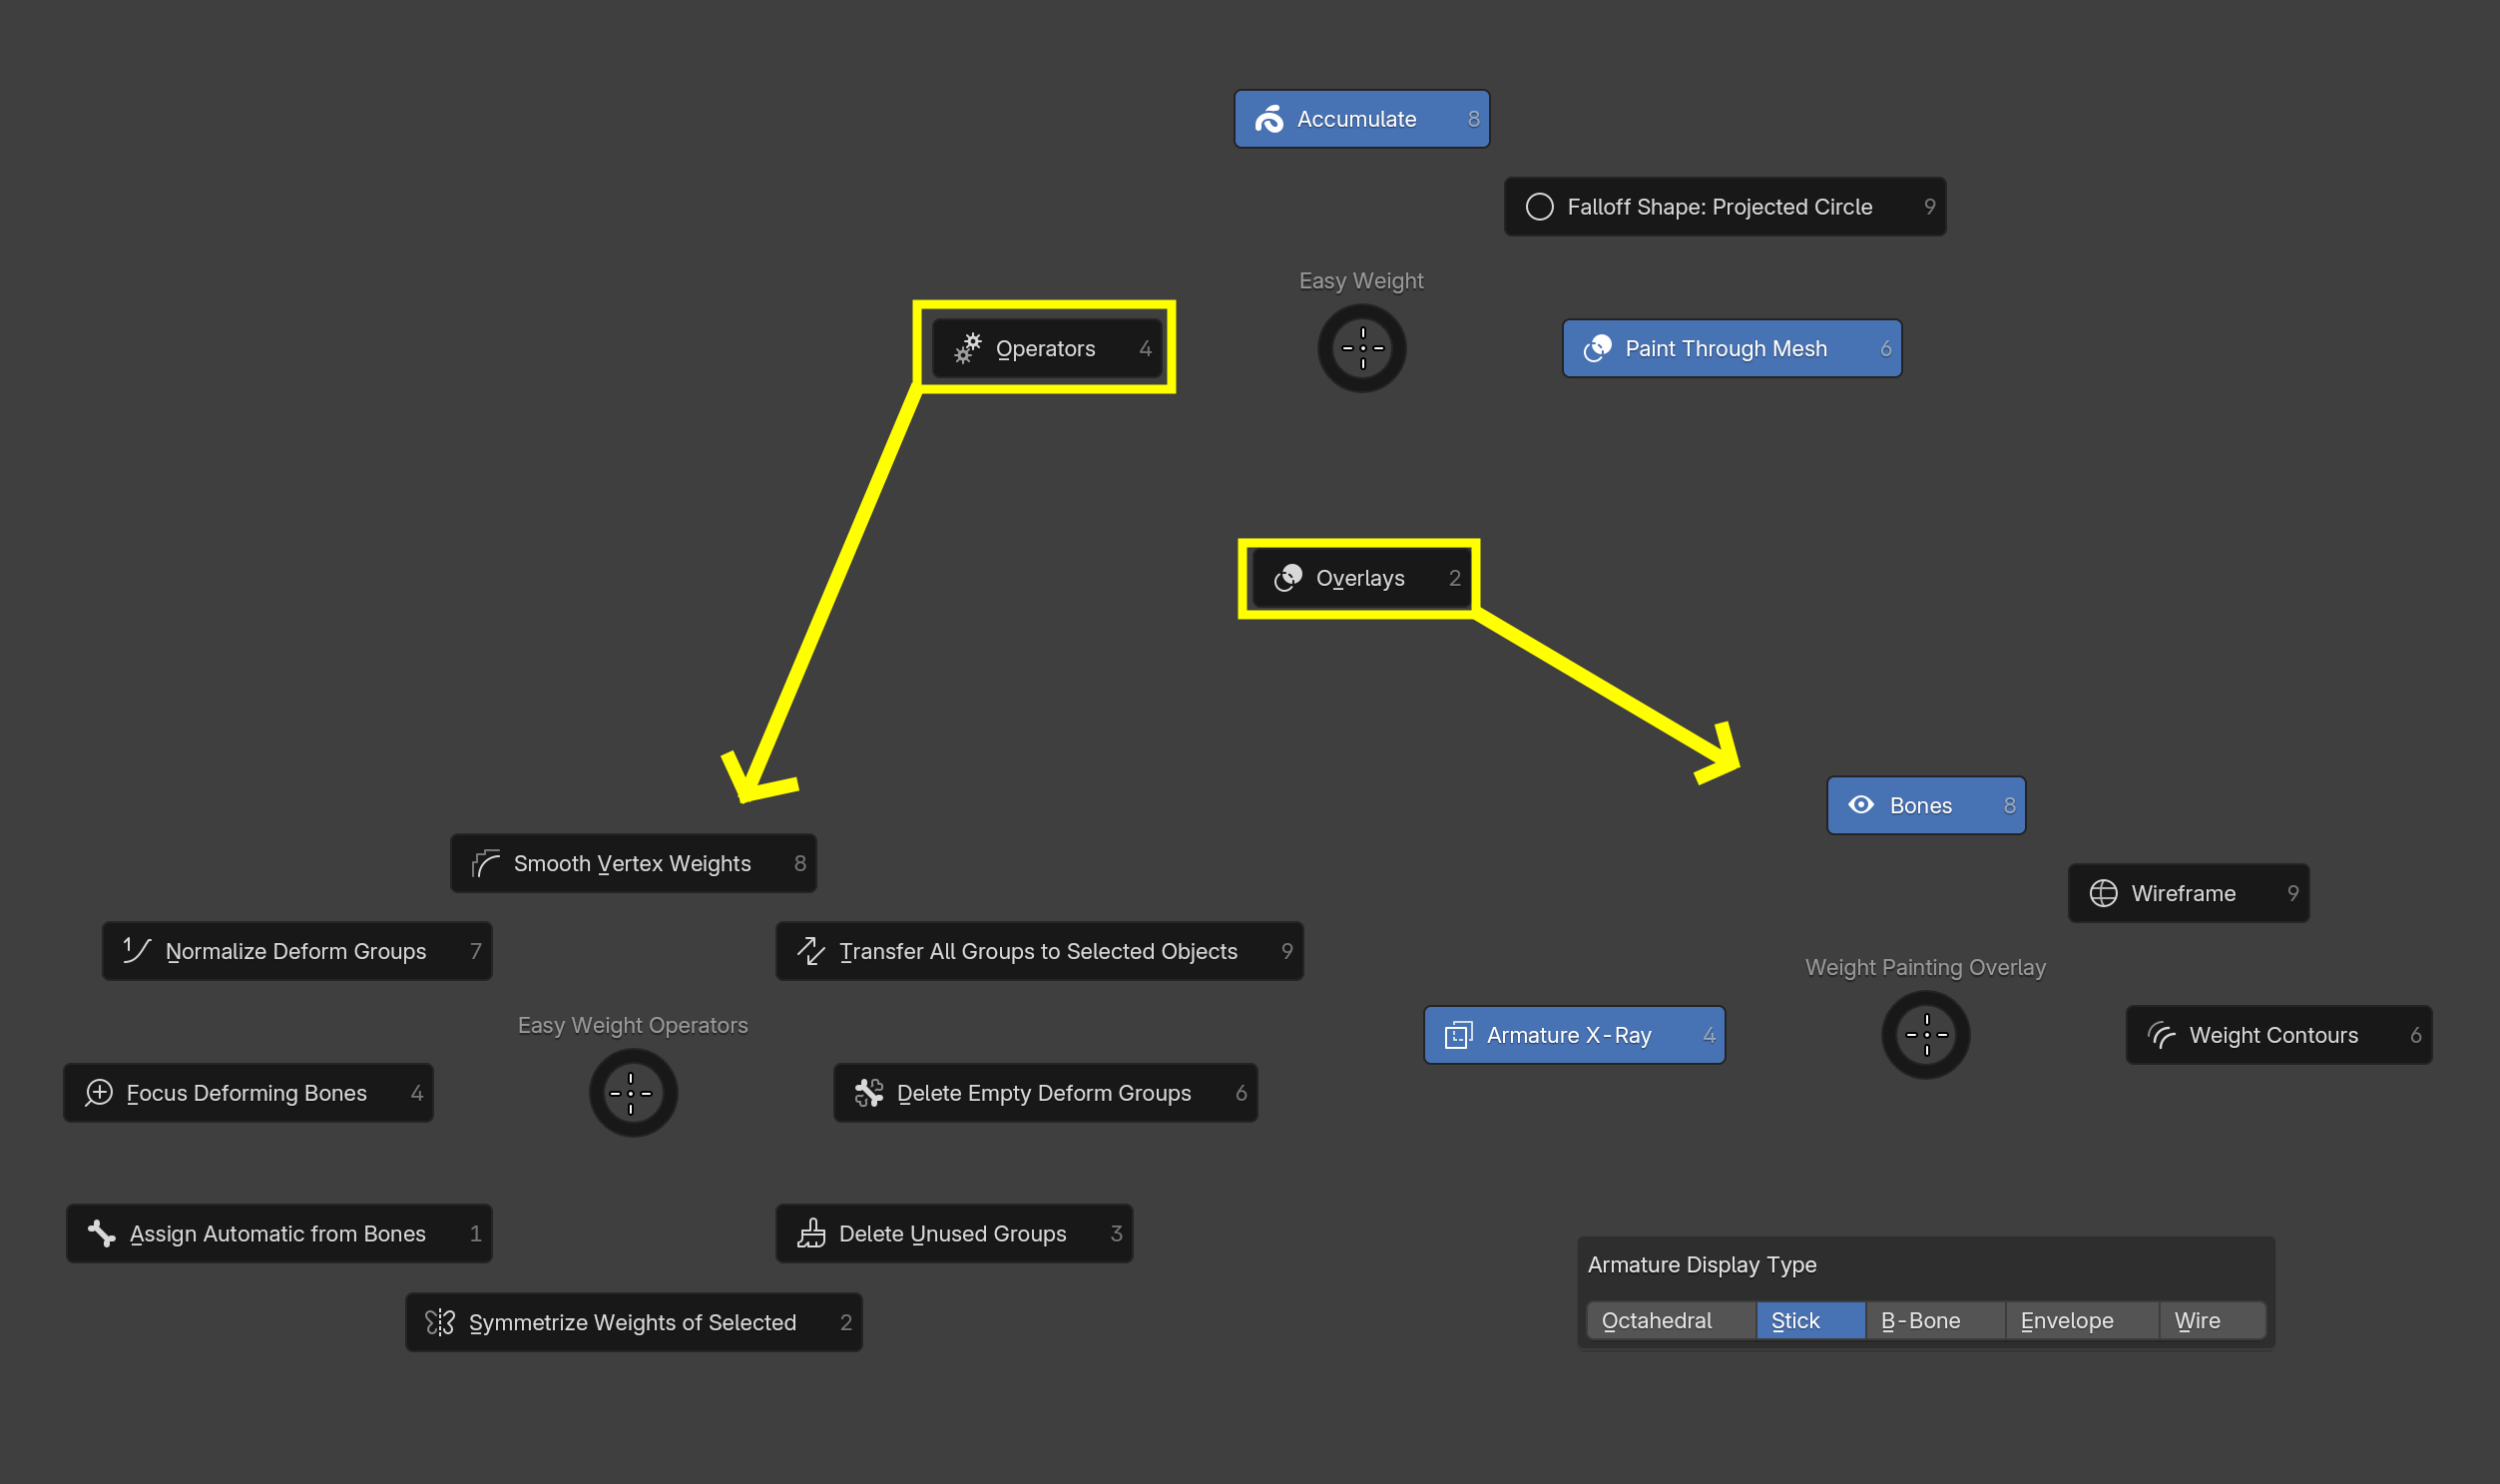
- These three options will affect all weight paint brushes in the scene.
- Operators:
- Focus Deforming Bones: Reveal and isolate all deforming bones contributing to the active mesh.
- Normalize Deform Groups: Ensure influence of deforming groups adds up to exactly 1.0 on each vertex.
- Smooth Vertex Weights: Smooth weights of all deforming bones on selected vertices.
- Transfer All Groups to Selected Objects: Useful for transferring weights to clothes.
- Clear Empty Deform Groups: Remove vertex groups associated with deforming bones, which don't have any weights at all.
- Clear Unused Groups: Remove vertex groups which are not associated with a deforming bone, and not used by any shape key, modifier, or constraint.
- Symmetrize Weights of Selected: Symmetrize the weights of selected bones, either left->right or right->left depending on the selection. Will handle center vertex groups as well. Implemented using KDTree, which means it will work even if the mesh topology isn't perfectly symmetrical.
- Assign Automatic From Bones
- Overlay Settings:
- Bones: Toggles drawing of bones altogether.
- Wireframe: Toggles mesh wireframe overlay.
- Weight Contours: Additional visualization to see how smooth your weight gradients really are.
- Armature Display Type: How bones without custom widgets should be displayed.
- In Front (X-Ray): Whether bones should be drawn even when behind meshes.
Hunting Rogue Weights
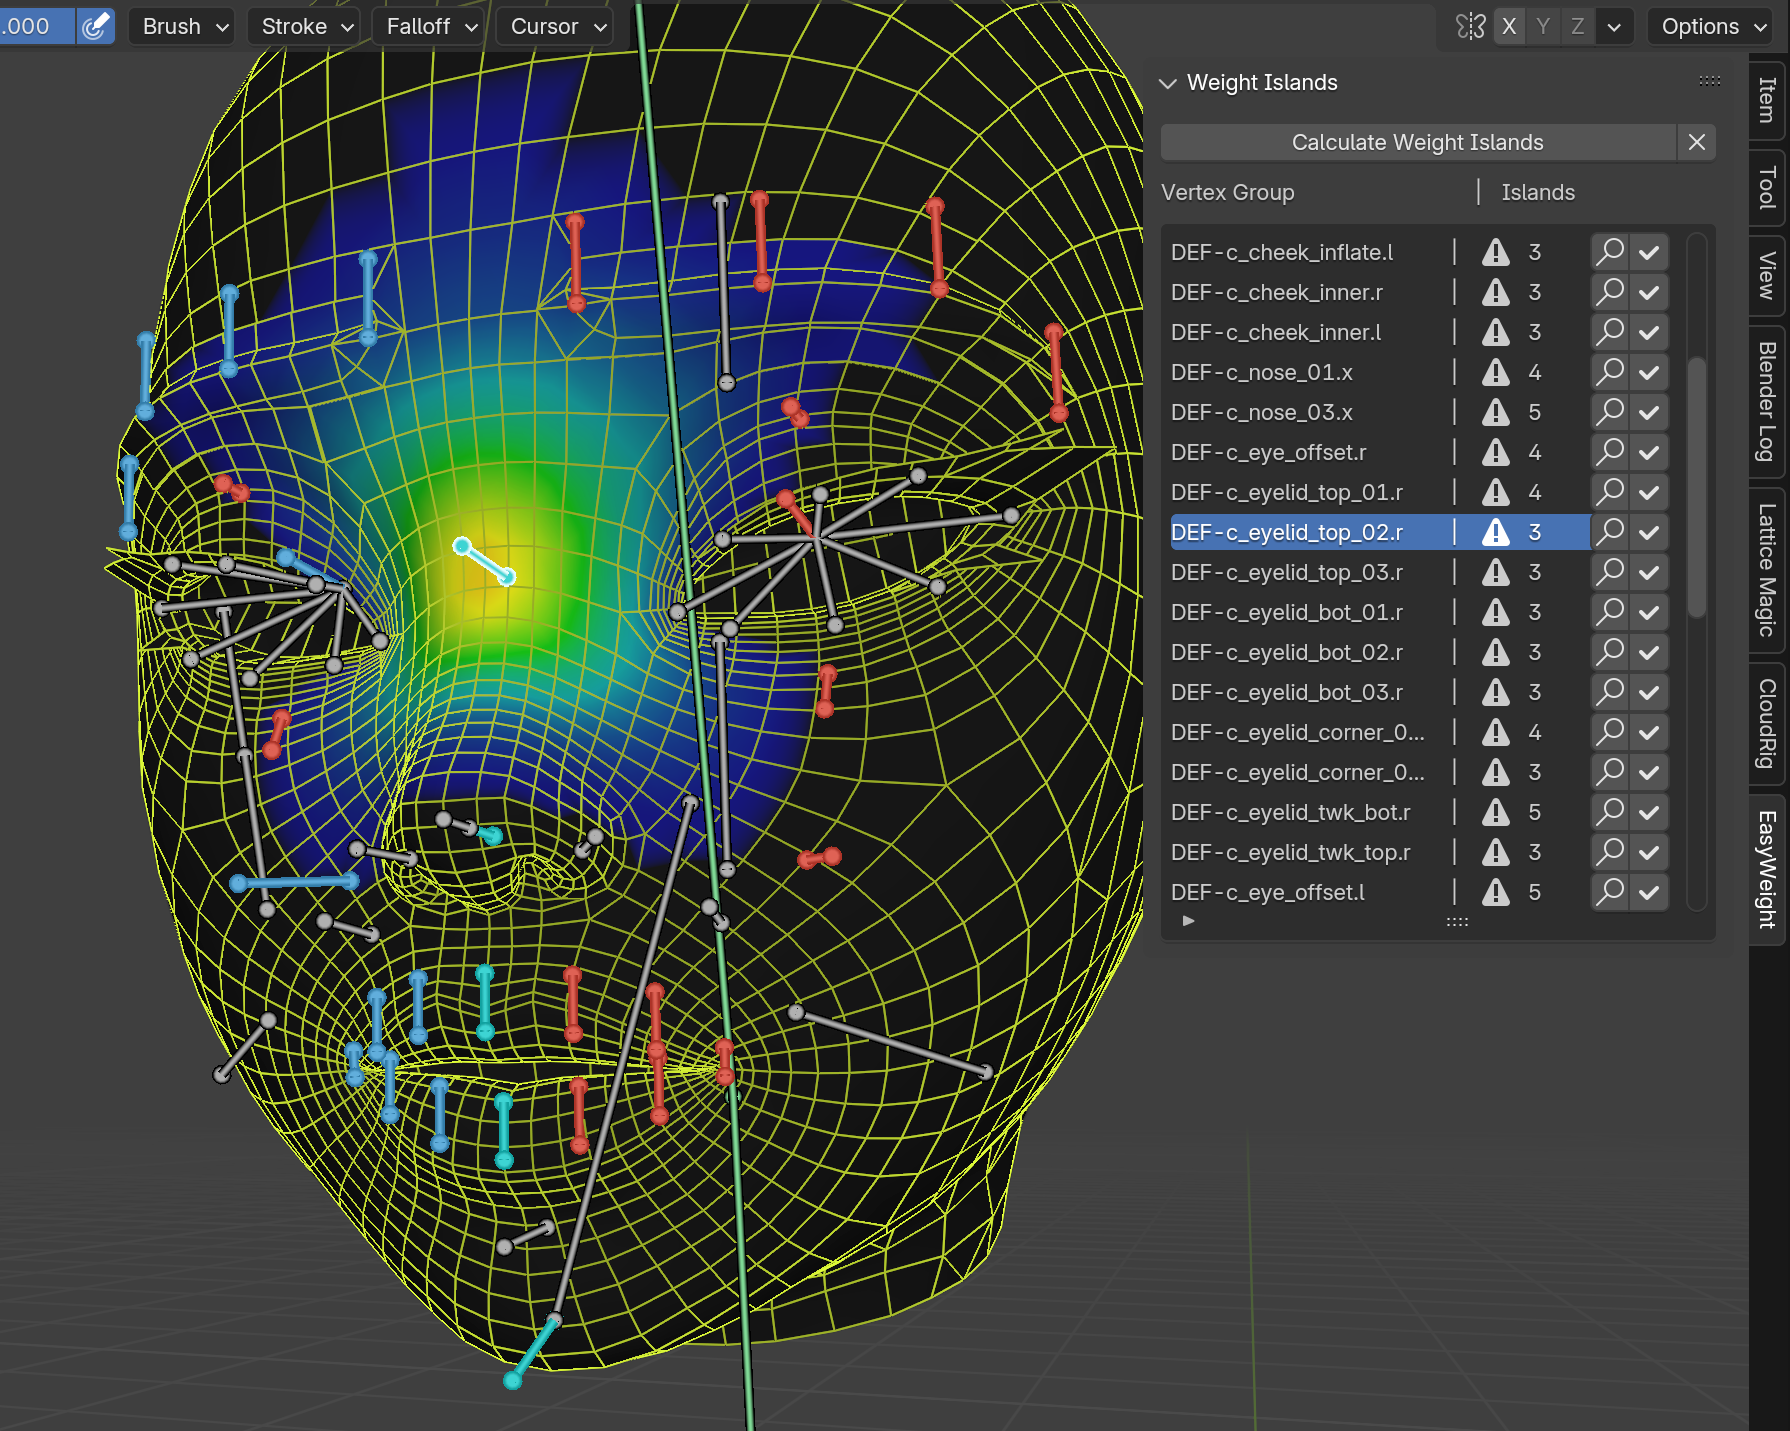
The Weight Islands panel lets you hunt down unintended rogue weights on a mesh. The workflow goes something like this:
- After pressing Calculate Weight Islands and waiting a few seconds, you will see a list of all vertex groups which consist of more than a single island.
- Clicking the magnifying glass icon will focus the smallest island in the group, so you can decide what to do with it.
- If the island is rogue weights, you can subtract them and go back to the previous step. If not, you can press the checkmark icon next to the magnifying glass, and the vertex group will be hidden from the list.
- Continue with this process until all entries are gone from the list.
- In the end, you can be 100% sure that you have no rogue weights anywhere on your mesh. You may click the X button to remove the islands' data, since you no longer need it.
Vertex Group Operators
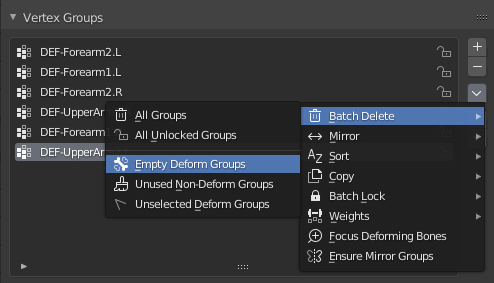
The Vertex Groups context menu is re-organized with more icons and better labels, as well as some additional operators:
- Delete Empty Deform Groups: Delete deforming groups that don't have any weights.
- Delete Unused Non-Deform Groups: Delete non-deforming groups that aren't used anywhere, even if they do have weights.
- Delete Unselected Deform Groups: Delete all deforming groups that don't correspond to a selected pose bone. Only in Weight Paint mode.
- Focus Deforming Bones: Reveal and select all bones deforming this mesh. Only in Weight Paint mode.
- Symmetrize Vertex Groups: Symmetrizes vertex groups from left to right side, creating missing groups as needed.
If you have any more suggestions, feel free to open an Issue with a feature request.
Force Apply Mirror Modifier
In Blender, you cannot apply a mirror modifier to meshes that have shape keys.
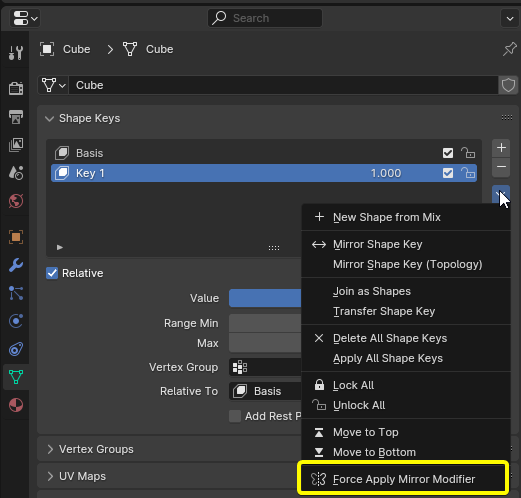
This operator tries to anyways, by duplicating your mesh, flipping it on the X axis and merging into the original. It will also flip vertex groups, shape keys, shape key masks, and even (attempt) shape key drivers, assuming everything is named with .L/.R suffixes.