SVN Set-Up
Install/Setup SVN
The Blender Studio Pipeline relies on SVN to version control all .blend files used in production. This guide will show you how to install an SVN on a workstation, assuming you already have an SVN server setup. To learn more about how to setup an SVN server visit the SVN Documentation
Linux/Mac
- Install SVN Client on your system via the SVN Documentation
- Use the following command to checkout the current SVN repository into the SVN directory.
bash
svn checkout http://your_svn.url ~/data/your_project_name/svnWindows
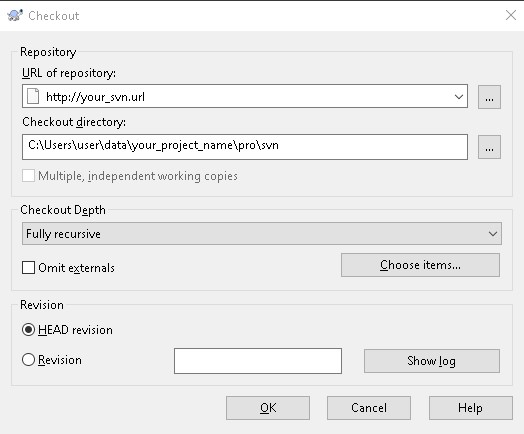
- Download & Install the TortoiseSVN Client
- Navigate to your project's root directory. Right-Click Select the
svnfolder and selectSVN Checkout - Enter the URL to checkout under
URL of repository - Select OK to begin checking out the repository

Committing Changes to Repository
Linux/Mac
To commit changes to the SVN use the following command. For more details see the SVN Documentation
bash
svn commit -m "My Descriptive Log Message"Windows
To commit changes from the TortoiseSVN client, follow the steps below. For more information see the TortoiseSVN Documentation
- Navigate to your project's root directory.
- Right-Click Select the
svnfolder and selectSVN Commit - Enter your commit's message in the box labelled
Message - Review what files have changed in the box labelled
Changes made
Note
For more details on how to set-up an SVN repository please see the official SVN Documentation and the TortoiseSVN Documentation