Login to view this content
Join Blender Studio for just €11.50/month and get instant access to all of our training and film assets!

Retopology Introduction
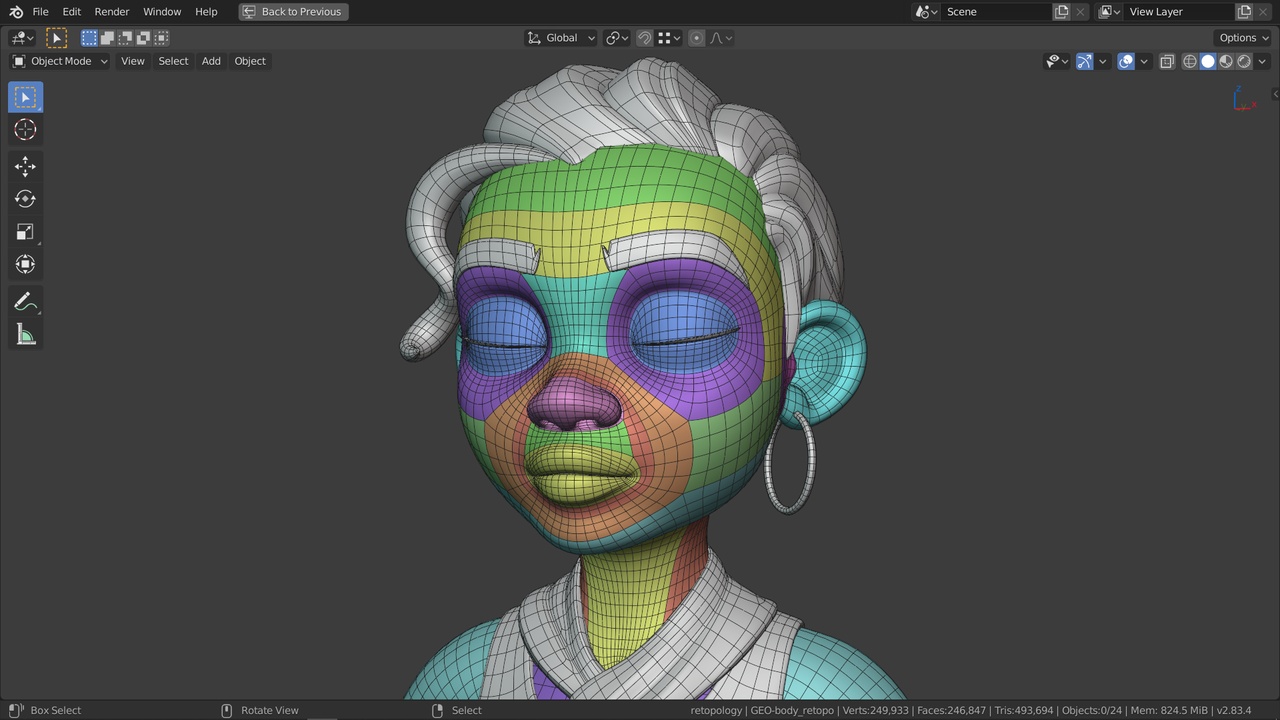
In this video I'll give a brief introduction & overview to the overall chapter, the main aspects of film asset topology & what makes a "good" retopology and more.
Other links:
- Rain - File 4: Retopology & UV mapping: The file that includes the original retopology of Rain.
- More Non-Manifold Examples: A website on the types of non-manifold geometry and how to fix them
General Links
15 comments

Do you have a tutorial how to bake the character?

@Varga Mihaly Not yet. Likely that would be part of any shading and texturing tutorials once I add them.

@Julien Kaspar I'm waiting for it. I didn't find anything good on youtube.

Hi, thank you for those great lessons but I just have a question. I'm actually looking for character creation for a game and, for me it doesn't look so different than what you show us until the retopology, so can you explain a little more how to do it for a game character please ?

@theogillot2 Sorry but this course is much about film topology. For games there are some significant differences like that the mesh won't be subdivided (so it needs to work well without smoothing), it needs to be triangulated (for better baking and more predictable normals) and even more optimisation on the side of UV maps and textures. This deserves its own tutorial series tbh.

Hey there! I am still following the class but I think I am gonna do a simpler project for the retopology part haha. The other one will stay a sculpt for now.
Thank you for the clean concepts. The class is really easy to understand.
Do you know if you will do a full-body retopo class by the way? I searched online but people keep contradicting each other most of the time. I find it hard to know whom to follow.

*@calmels.gaelle* Thanks a lot! ^^
Next week the size of chapter 4 will double in size since I will publish all the commentated timelapse videos from the character Rain.
This will be a full look at my 22 hour process on retopologizing the head, body, hair, clothes and additional objects and finishing touches.
I will go over it faster than in the lessons but I will mostly rely on the same theory & practices and show how to use them on other areas of the retopology.
Everybody does retopology a bit differently and it also depends on the engine, medium & art-style.
You can already download and have a closer look at the file of the result from the retopology timelapses.
I think the retopology for Rain ended up as a bit too dense but looking at the edge flow and colored patches can be very helpful :)

*@Julien Kaspar* Thank you!
I am looking forward to next week :) I really need to see the separate areas more than anything.

Thank u very much. In the first Chapter, u had drawn the whole body using Vertex Painting. I have a question.. As soon as I had done the retopology, do I have to make the UV MAP and redo the skin shade or is it the same?

*@pop.loreee* I did reuse the vertex colors after the retopology but I also made UV maps. Since you can freely mix many color inputs for the texturing, I mixed them with vertex colros for base colors, textures for extra definition and procedural textures for more random detail.
So you won't have to redo everything if you don't want to.

*@Julien Kaspar* Thx. God bless u

Thanks Julien. I say that it is as relaxing as knitting crochet, at least to me.. :)

Hi, Thank you for those high quality lessons! can I ask you if this is the last part?

*@djadmadu93* The other chapter have been removed for now since it's not clear when they will be finished. Since I'm working on current film projects as well, I don't have much time for the course so each following chapter will be released when they are ready. Around 4 additional chapters are still planned for the future.

*@Julien Kaspar* Thanks a lot i've learnt a lot from your tutorial that's what managed to do thanks to your lessons! https://media.giphy.com/media/QXUKd1KLxAgmiqcclY/giphy.gif
Join to leave a comment.