Login to view this content
Join Blender Studio for just €11.50/month and get instant access to all of our training and film assets!

Timelapse: Snow's Expression Tests
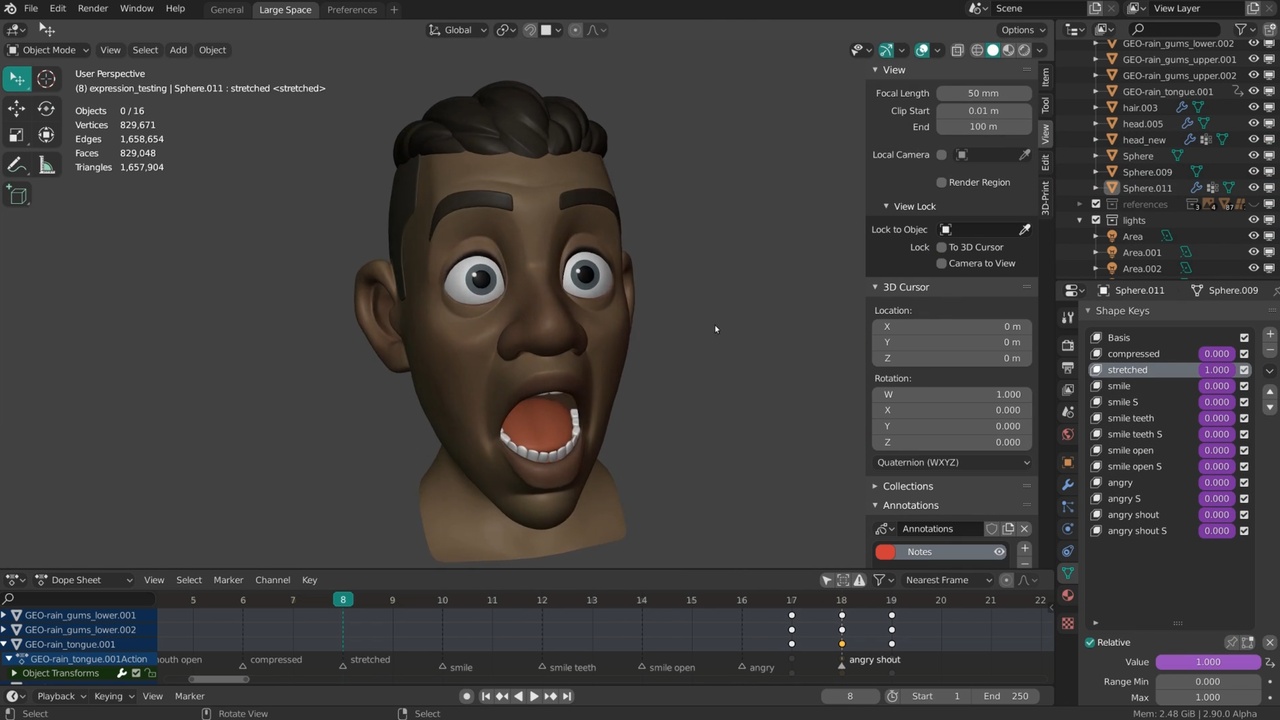
With this video I am finally adding some actual timelapses to this chapter in addition to the previous breakdown videos. Most of this is the same workflow so I'll not comment on it too much, like starting with the basic shapekeys like closed eyes and an open mouth. One of the differences with Snow is that I tried to shrinkwrap the sculpted details on the mouth & eyelids as well. This made it harder to close the eyes but I got to keep some of the small details. I still recommend to not have any sculpted detail on the multires modifier for the eyes & mouth area tough. Nowadays I would use the "Multires Dispplacement Eraser" brush to get rid of these.
Instead of using vertex groups I updated my workflow to use the Face Sets in sculpt mode. This lets you very quickly mask and hide portions of your object in sculpt mode. Face Sets can very easily be generated from Edit Mode selections, UV seams, Materials and separated geometry. I also used the transform tools in sculpt mode to rotate and move geometry but some precise tweaking of vertices was still done in Edit Mode.
The temporary lighting setup I made in Eevee made it clear that I would eventually need to change the skin tone but the current one still worked better when using Matcaps. Animating the shapekeys as you are working on them and adding Drivers still helps to quickly compare the default expression with the tests. Eventually I mixed shapekeys to create new ones but I always recommend now to "create new shapekeys from mix" because then each expression is independent and can be tweaked separately. Don't mix shapekeys in that are meant for another expression!
Whenever I wanted to exaggerate some specific creases I usually went into edit mode to push specific edges and vertices closer to another. A relatively high base resolution is necessary for this and in the past I had to subdivide the head mesh too often because I didn't take that into account.
At one point I tried automating the eyebrow shapekeys a bit by adding a surface deform modifier so that it automatically follows the skin underneath. This modifier I could then regularly apply as a shapekey and then tweak further. This became a bit cumbersome though because the modifier only gave a preview in object mode. So it was hard to predict where the eyebrows were or would end up.
There weren't many adjustments I made to the design as a result of these expression tests. One of them was the height of the brow vs the nose since it was difficult to get a believable crease during the squashing of the face. The bridge of the nose should be mostly solid so the crease ended up as way too high in comparison to the eyes. So I lowered the highest point of the nose bridge.
With Snow I didn't add any head rotation or eye direction though.
Links:
- Blender Studio YouTube Channel: Here you will be able to find the latest live steams and more.
- Snow Sculpting File: The sculpting file of this and the following timelapses and live streams.
- Snow Expression/Pose Testing File: The file that contains all final expression sculpts and the pose sculpt next to Rain.
General Links
2 comments

Hey Julien, I really like the expression aspect of the character creation and I'd like to actually rig my character so I can keep my expressions. Do you know of any resources I could use to learn this? I know this is probably a very specific skill that I am looking to pick up.

@Anna Ho You can transfer your shapekeys from the test model to the final retopology with a SurfaceDeform modifier. It will not be perfect so be prepared to do a bit of cleanup on the shapekeys.
On how to use these shapekeys in your rig: There's a few resources that you can find in this blog post and the Pipeline Rigging sections.
I hope this helps!
Join to leave a comment.